Silver Anniversary Content Creator Guide

Over the past 25 years, talented creators from all disciplines have helped share and define the world of Halo. Without the streamers, let’s-players, machinima makers, lore masters, and all the other incredible creators in our community, Halo wouldn't be the thriving fandom it is today.
We have so many creatives to thank for applying their interests and skills to Halo and making it a place for all to come together. From everyone on the Halo Studios Community team, we’d like to thank you for a quarter-century of stunning creations!
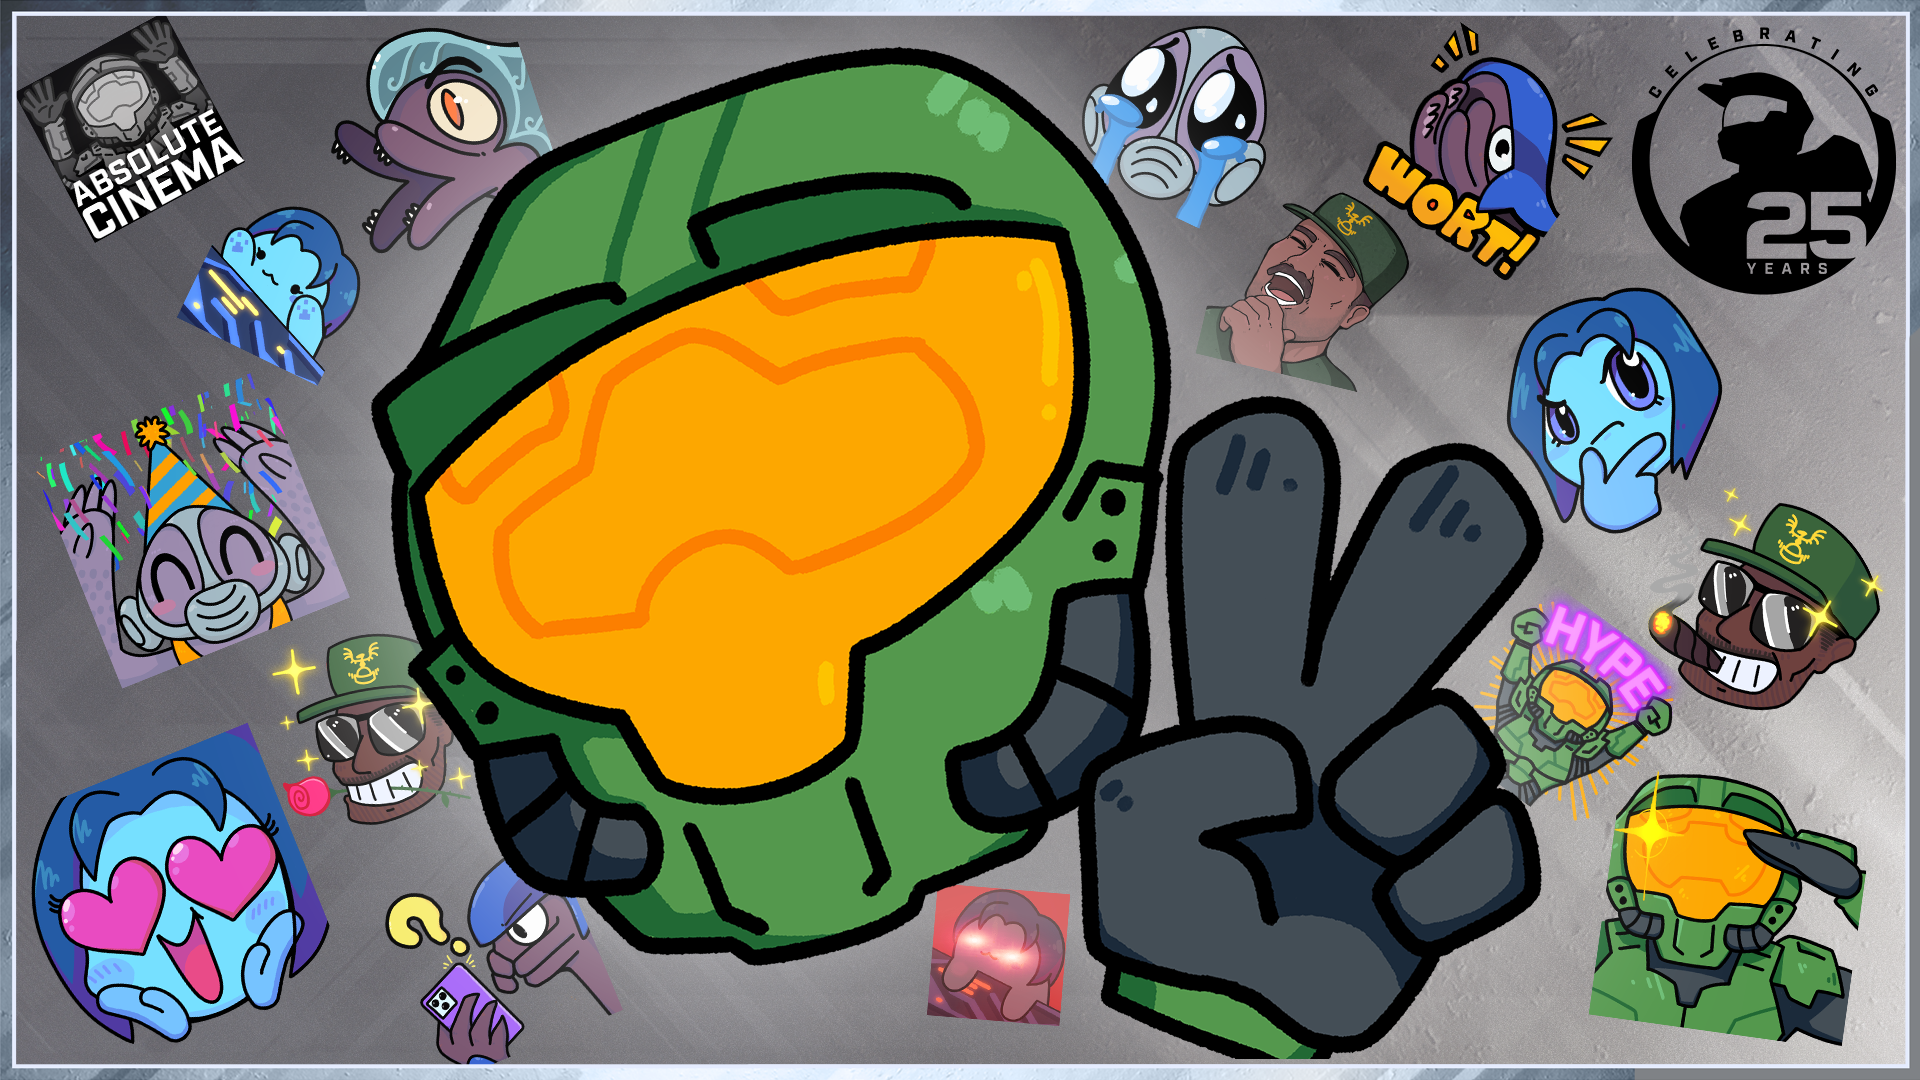
As part of our year-long 25th anniversary celebration, we’re excited to share the Silver Anniversary Content Creator Bundle, a streamer graphics pack containing overlay frames, Halo-themed emotes, and all the necessary ordnance for rookie streamers to get started—or to help veteran creators mix it up a little.
Here’s a look at everything in the bundle:
- Custom alerts for subscribers, followers, donations, raids, and bits
- 15 unique Halo-themed emotes
- Graphics for stream lobbies, webcam overlays, profile borders, and more
- High-fidelity audio clips to pair with your custom alerts
- Silver Anniversary-themed transition for switching stream scenes
Download the Content Creator Bundle to join the fun, and read on to learn how to use these essential elements in your own stream setup using OBS Studio!
WHAT YOU’LL NEED
After downloading the Creator Content Bundle, you’ll need a few simple things to get started:
- a PC or laptop to run your streaming software
- streaming software such as OBS Studio or Streamlabs (the Streamlabs OBS plugin is also useful for accessing additional streaming features from Streamlabs)
If you would like to capture gameplay from a console, you will also need to acquire a video capture card to send video output from your console to your PC.
Once you have installed your desired streaming software, you may want to consider signing up for a service such as Streamlabs or StreamElements, which can help you set up animated on-screen alerts for new subscribers, follows, donations, and more!
In the following steps, we’ll create a scene in OBS Studio by capturing gameplay and adding a webcam output, a webcam overlay, and customizable Silver Anniversary-themed subscriber alerts.
CAPTURING GAMEPLAY
To capture gameplay, you’ll first need to create a "Scene” and set up your video devices.
In OBS Studio, scenes are visual templates that allow you to organize on-screen elements—such as the presenter’s picture-in-picture display, alerts, and other graphics—for handy use in specific contexts. For instance, streamers can use scenes to quickly switch between gameplay and webcam-only views for chatting with their audience in a lobby.
Let’s create our first scene together using captured video as the foundation!
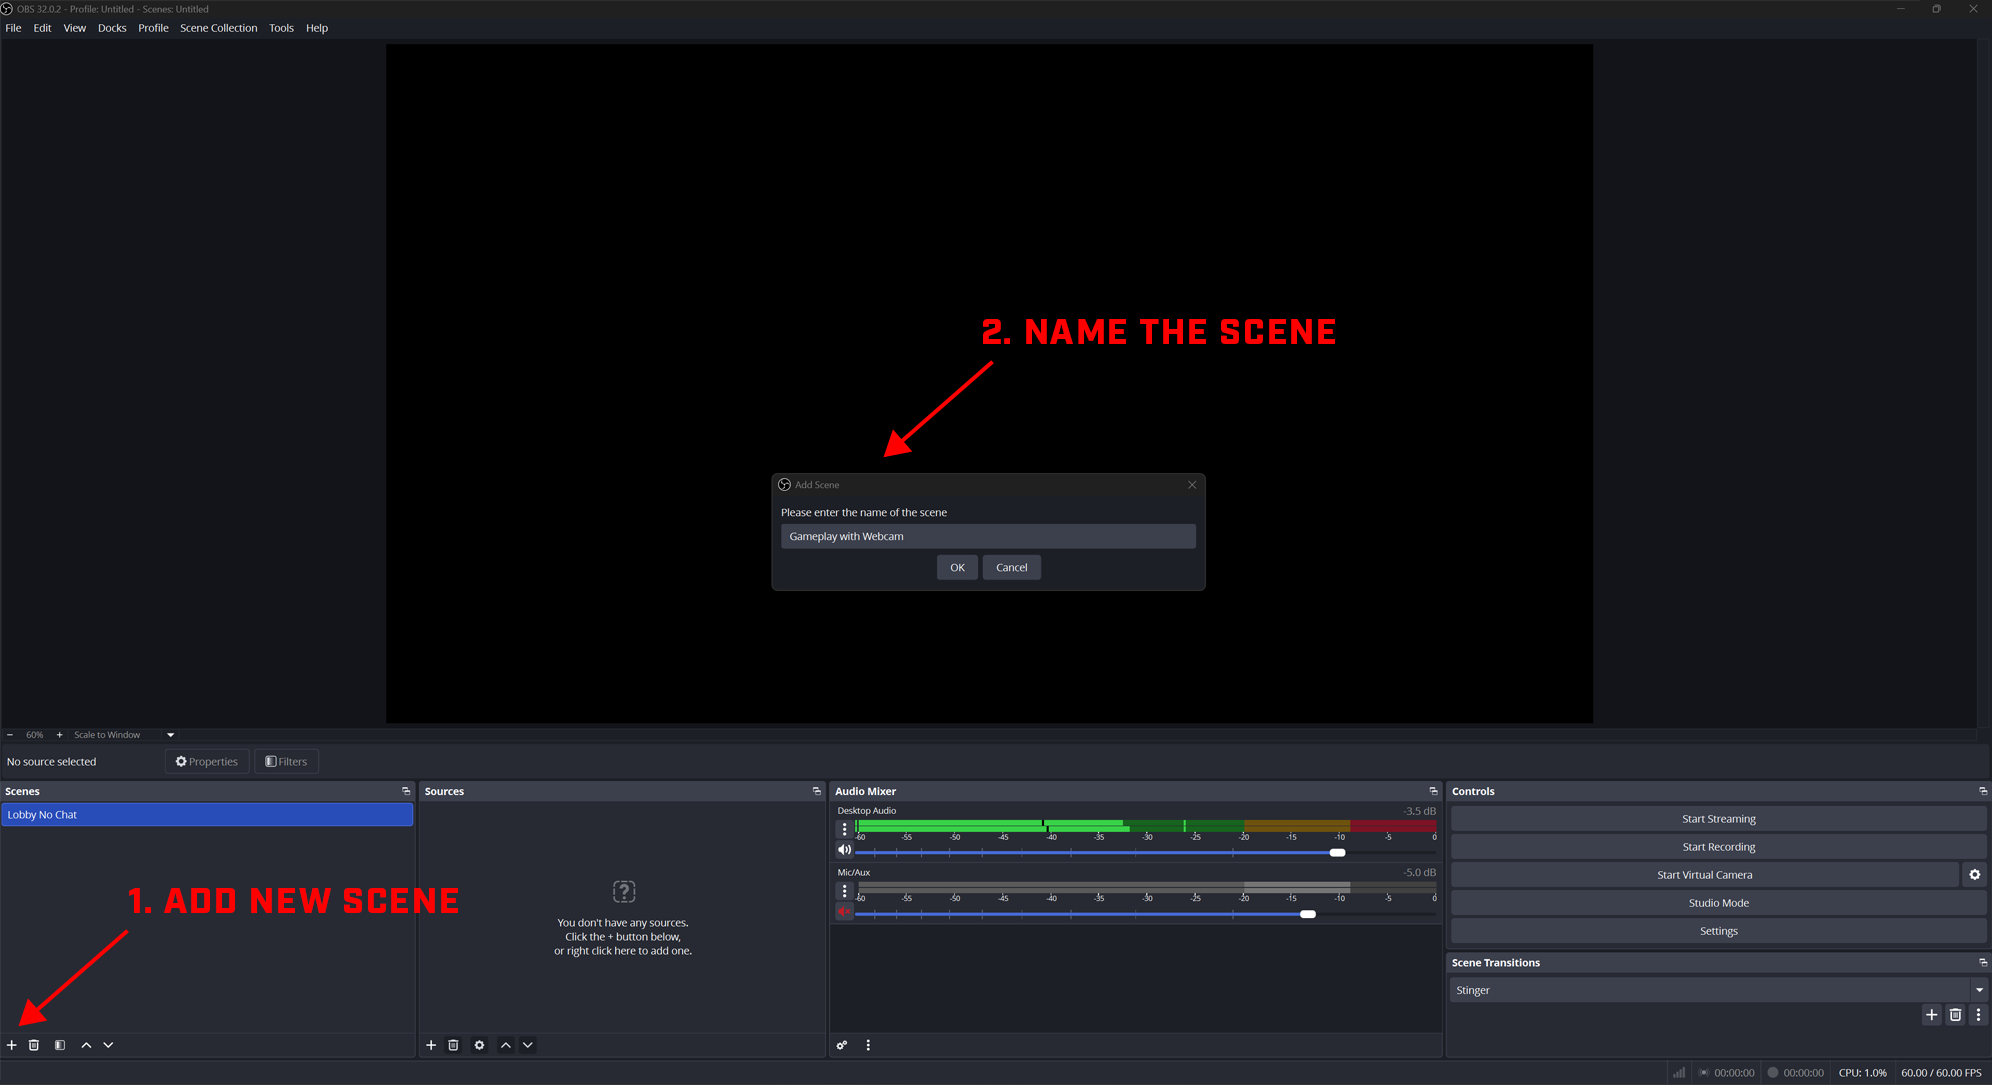
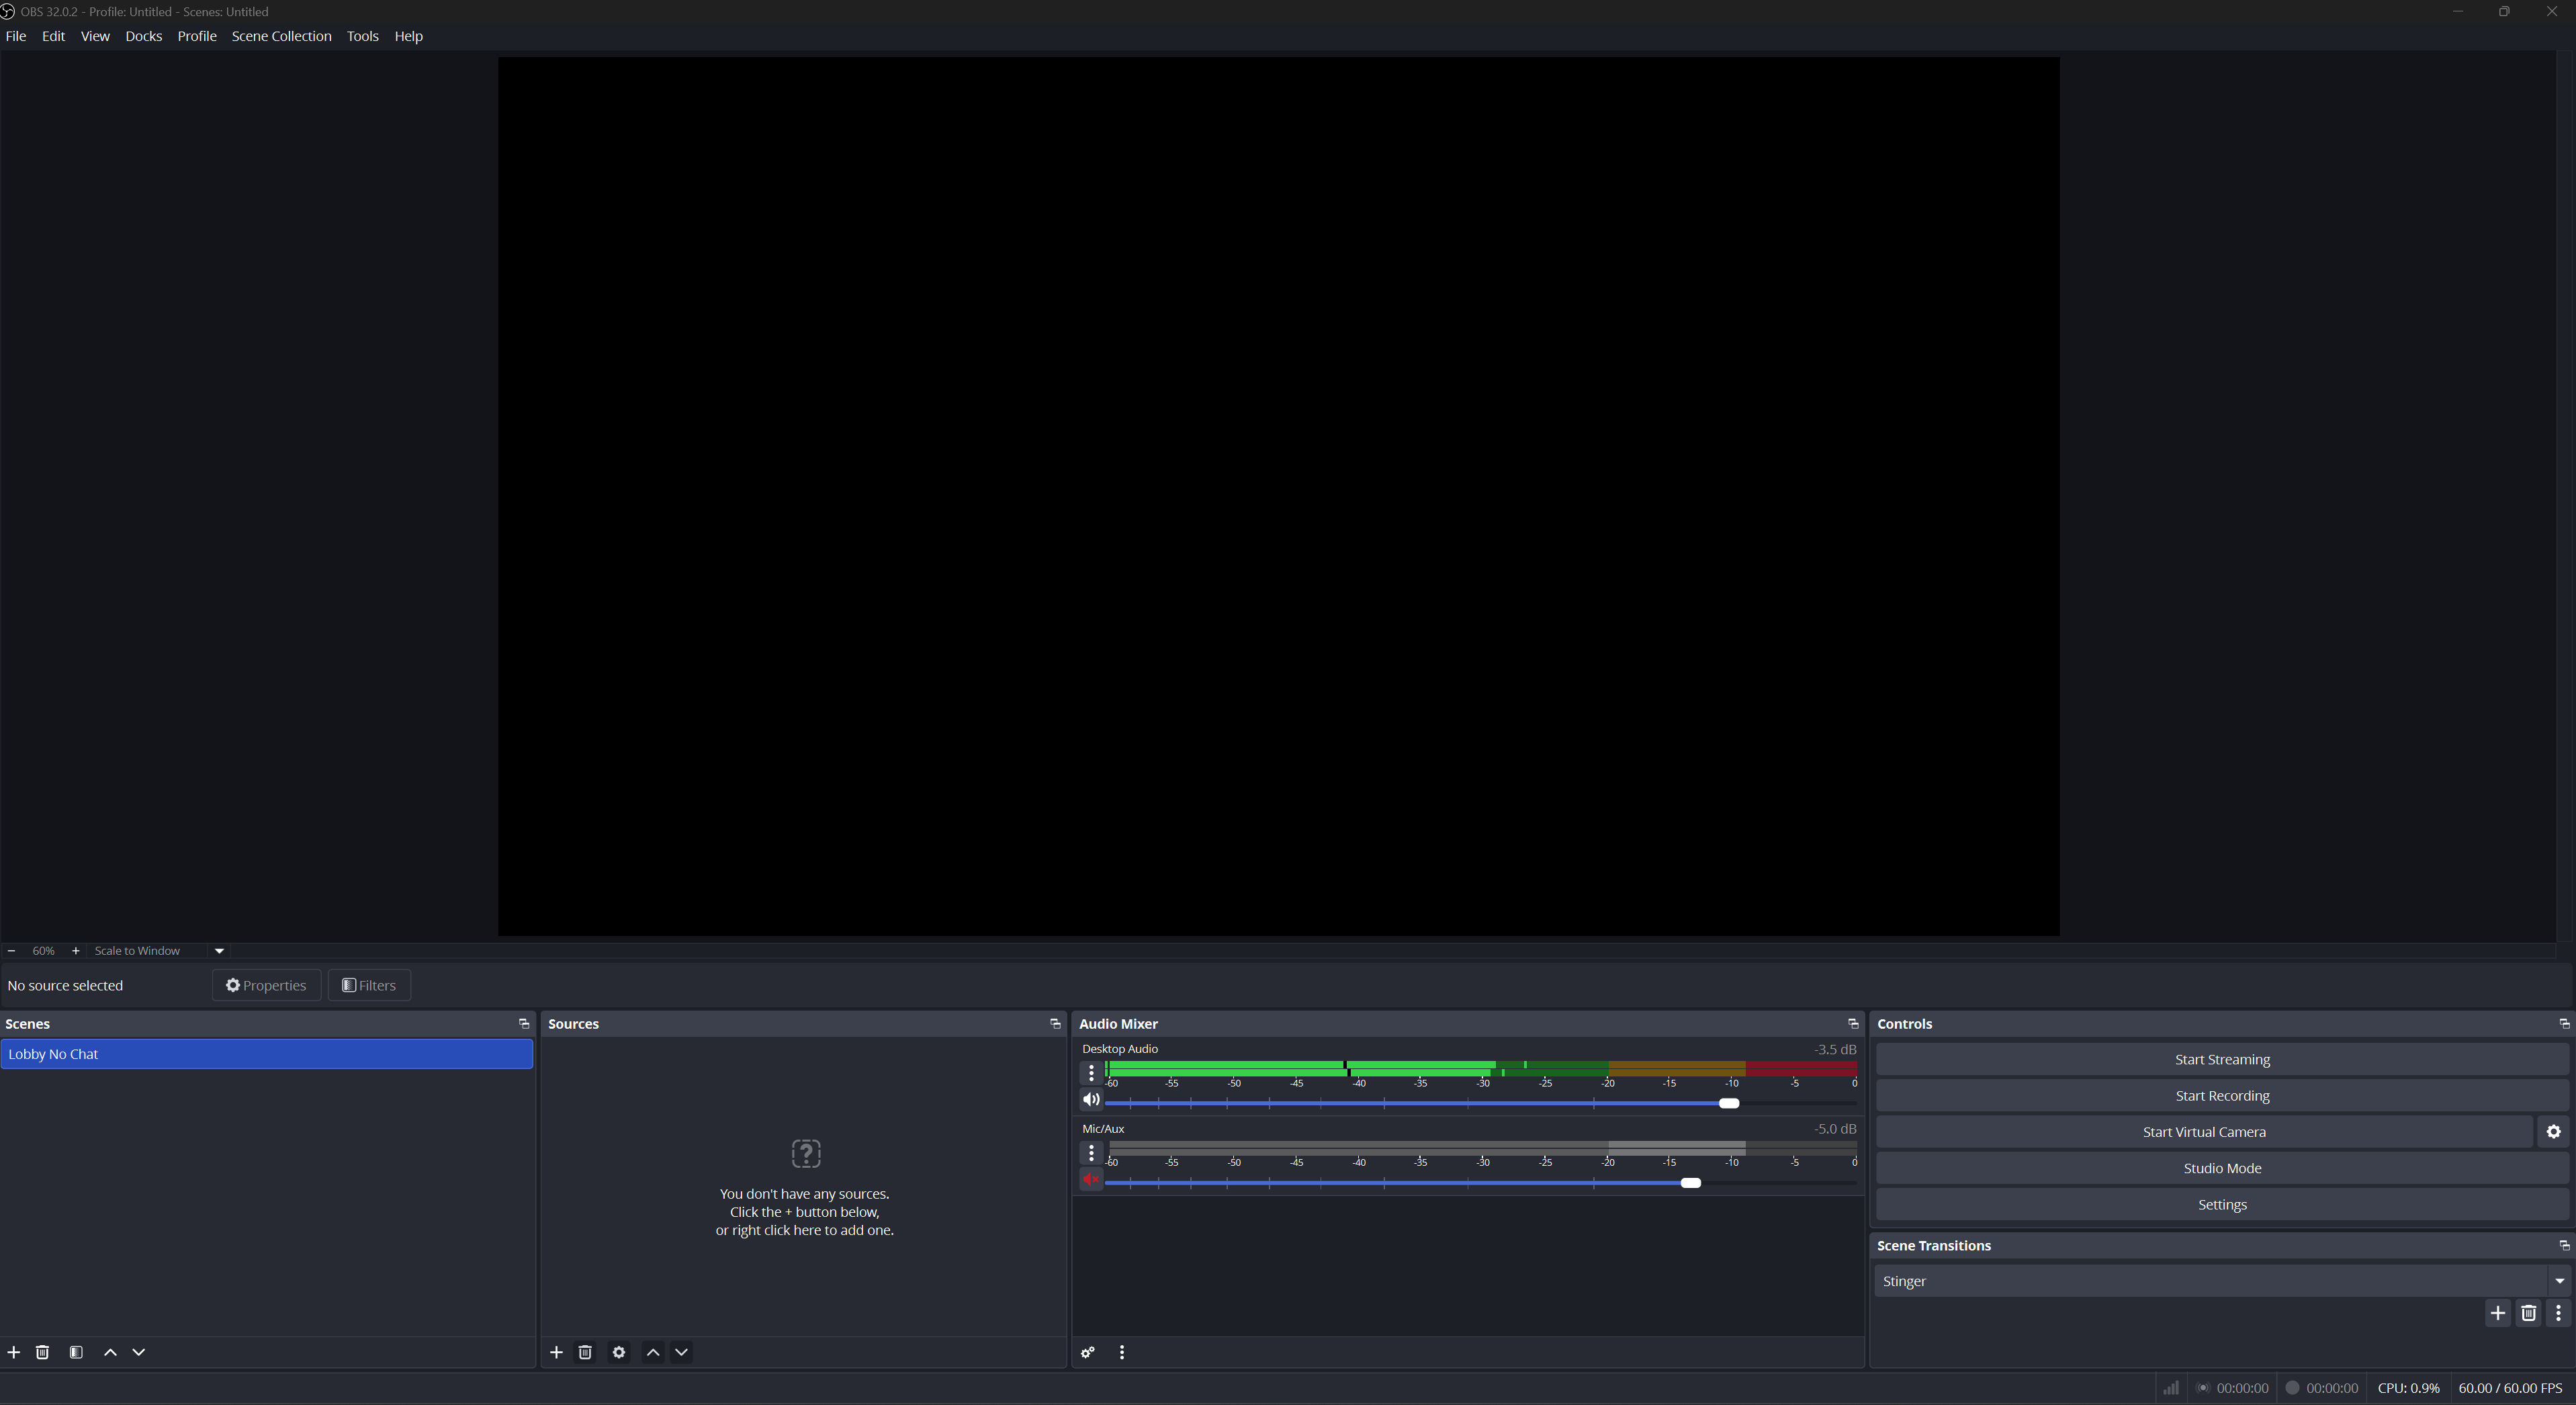
First, select the plus icon in the bottom-left “Scenes” panel. You will be prompted to name your scene, so we’ll name ours “Gameplay” to remember the template’s content later.
Now select the plus icon on the “Sources” panel. You should see a menu with the following options:
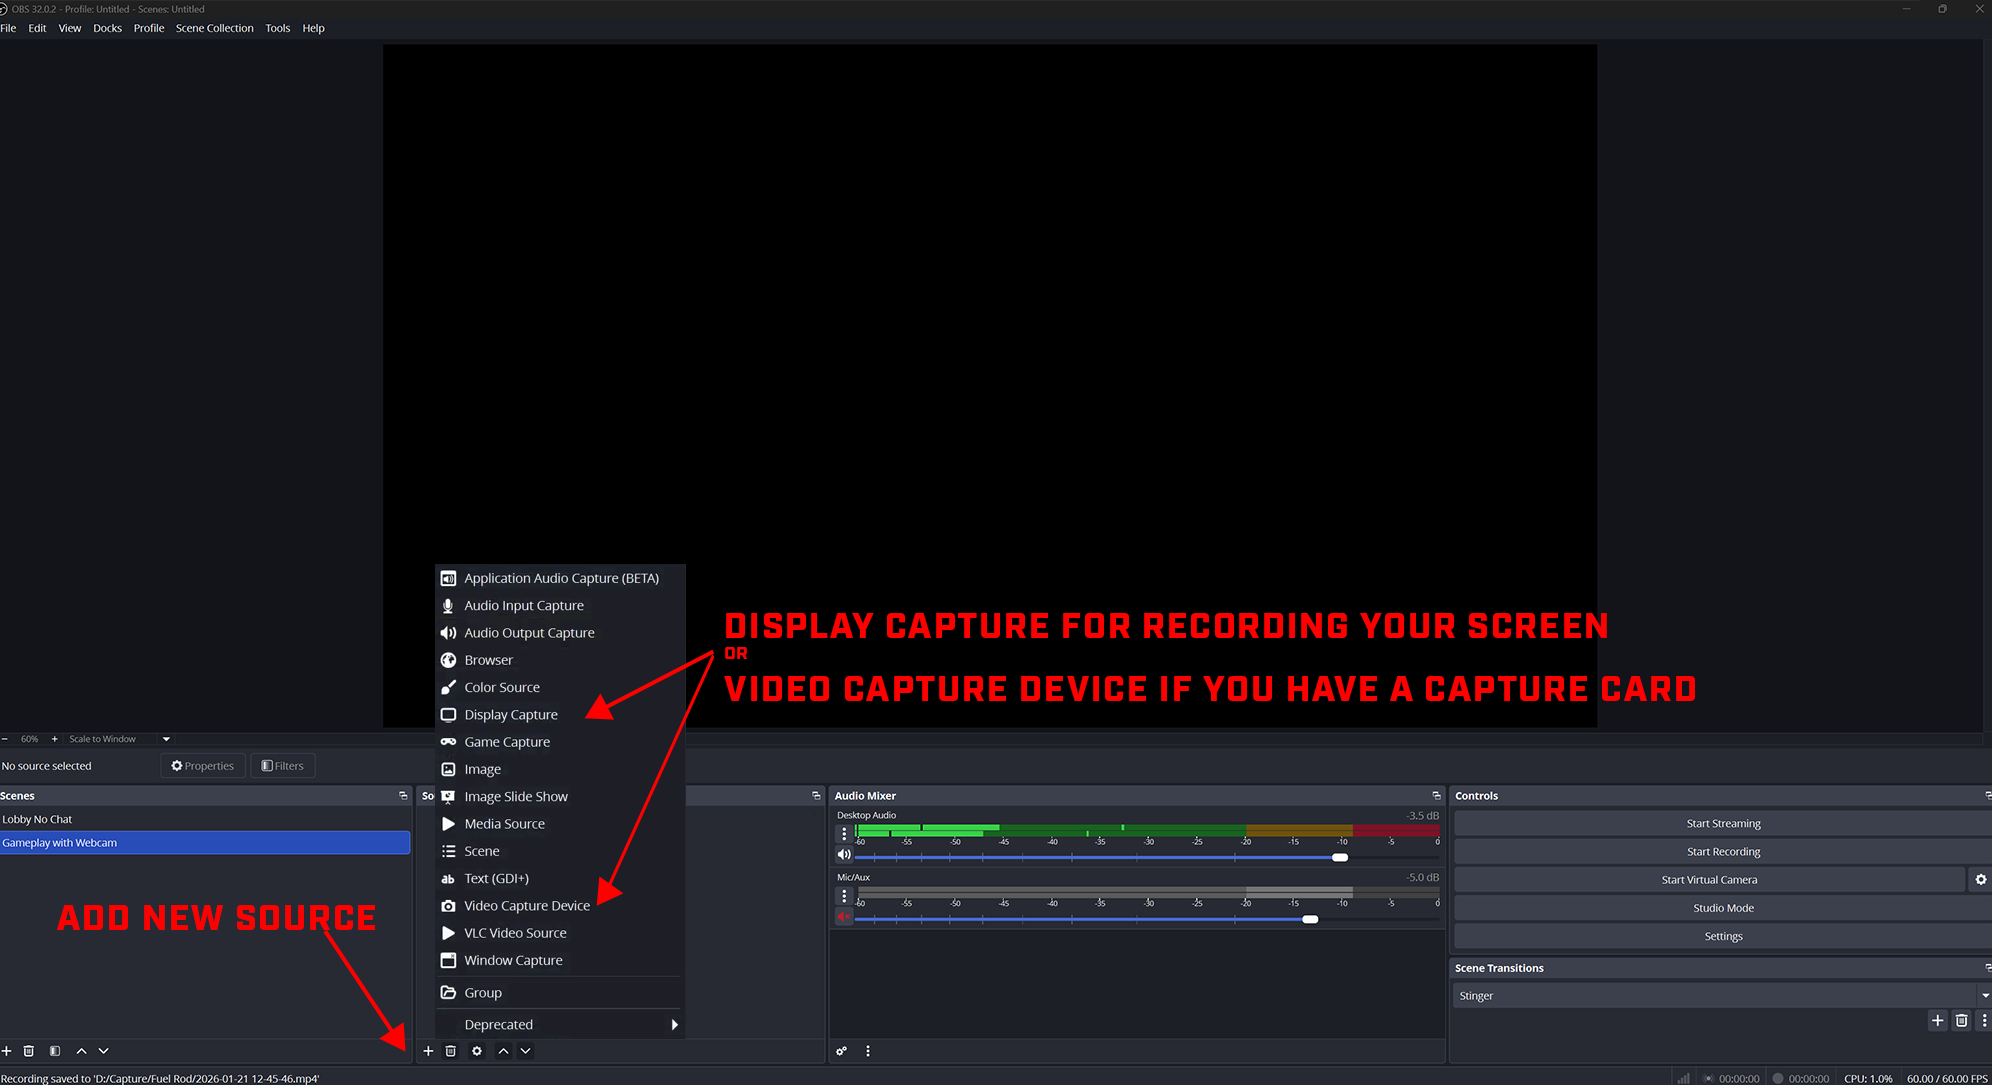
What option you choose at this stage ultimately depends on your desired setup. If you wish to record gameplay footage on the same PC that is running your streaming software, select “Display Capture.” If you’d prefer to capture from a console connected via a capture card, then select “Video Capture Device.” You may then name your selected video source.
Once you have named the source, you will be prompted to choose to connect an available screen or input device. Click “Okay” to finalize your choices, and you’re good to go!
SETTING UP A WEBCAM
Though optional, incorporating a webcam into your setup is a great way to connect with your audience! In this section, we’ll hook up our webcam output and add a visual overlay from the Creator Content Bundle to frame it nicely.
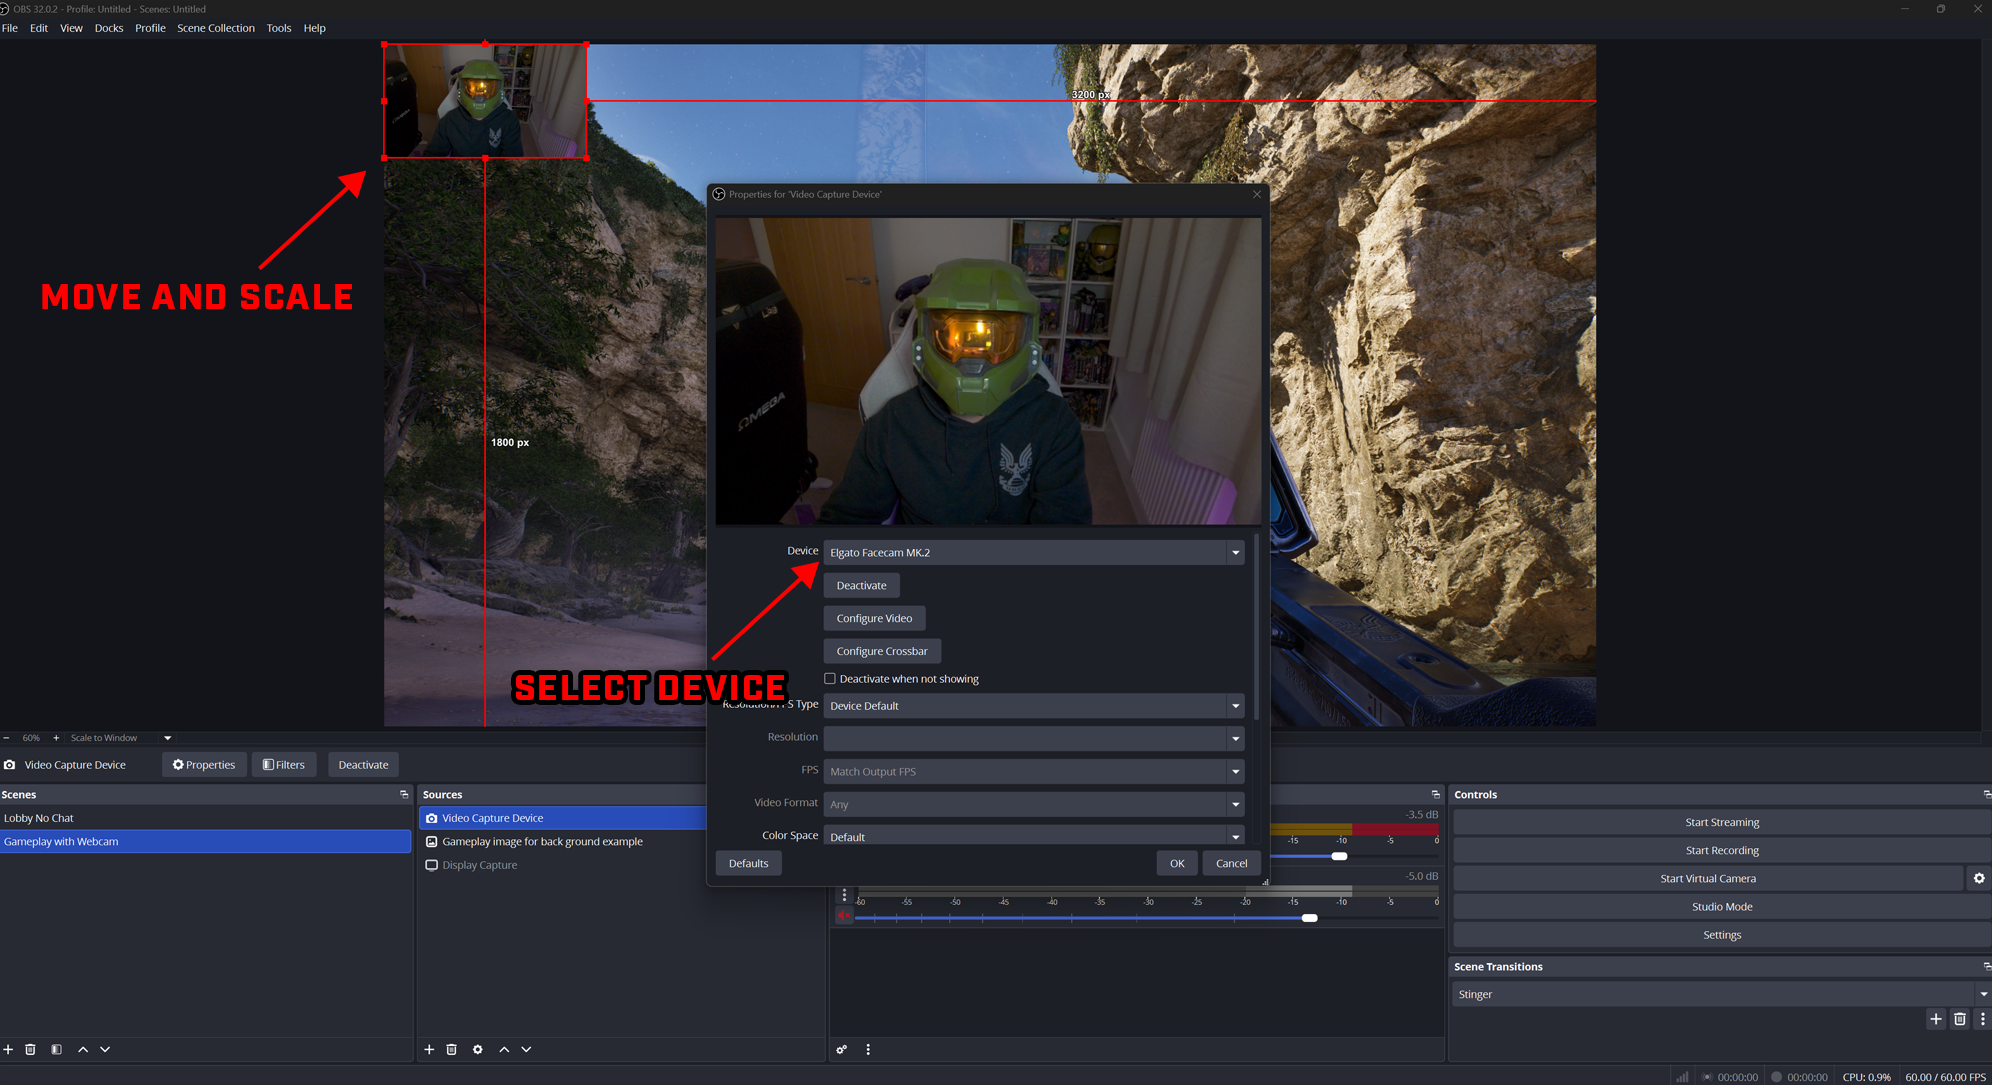
To add your webcam’s output to your scene, we’ll need to add a new source like before, but this time you’ll select your connected webcam from the list of available devices. Once selected, you should be able to see your face in the scene.
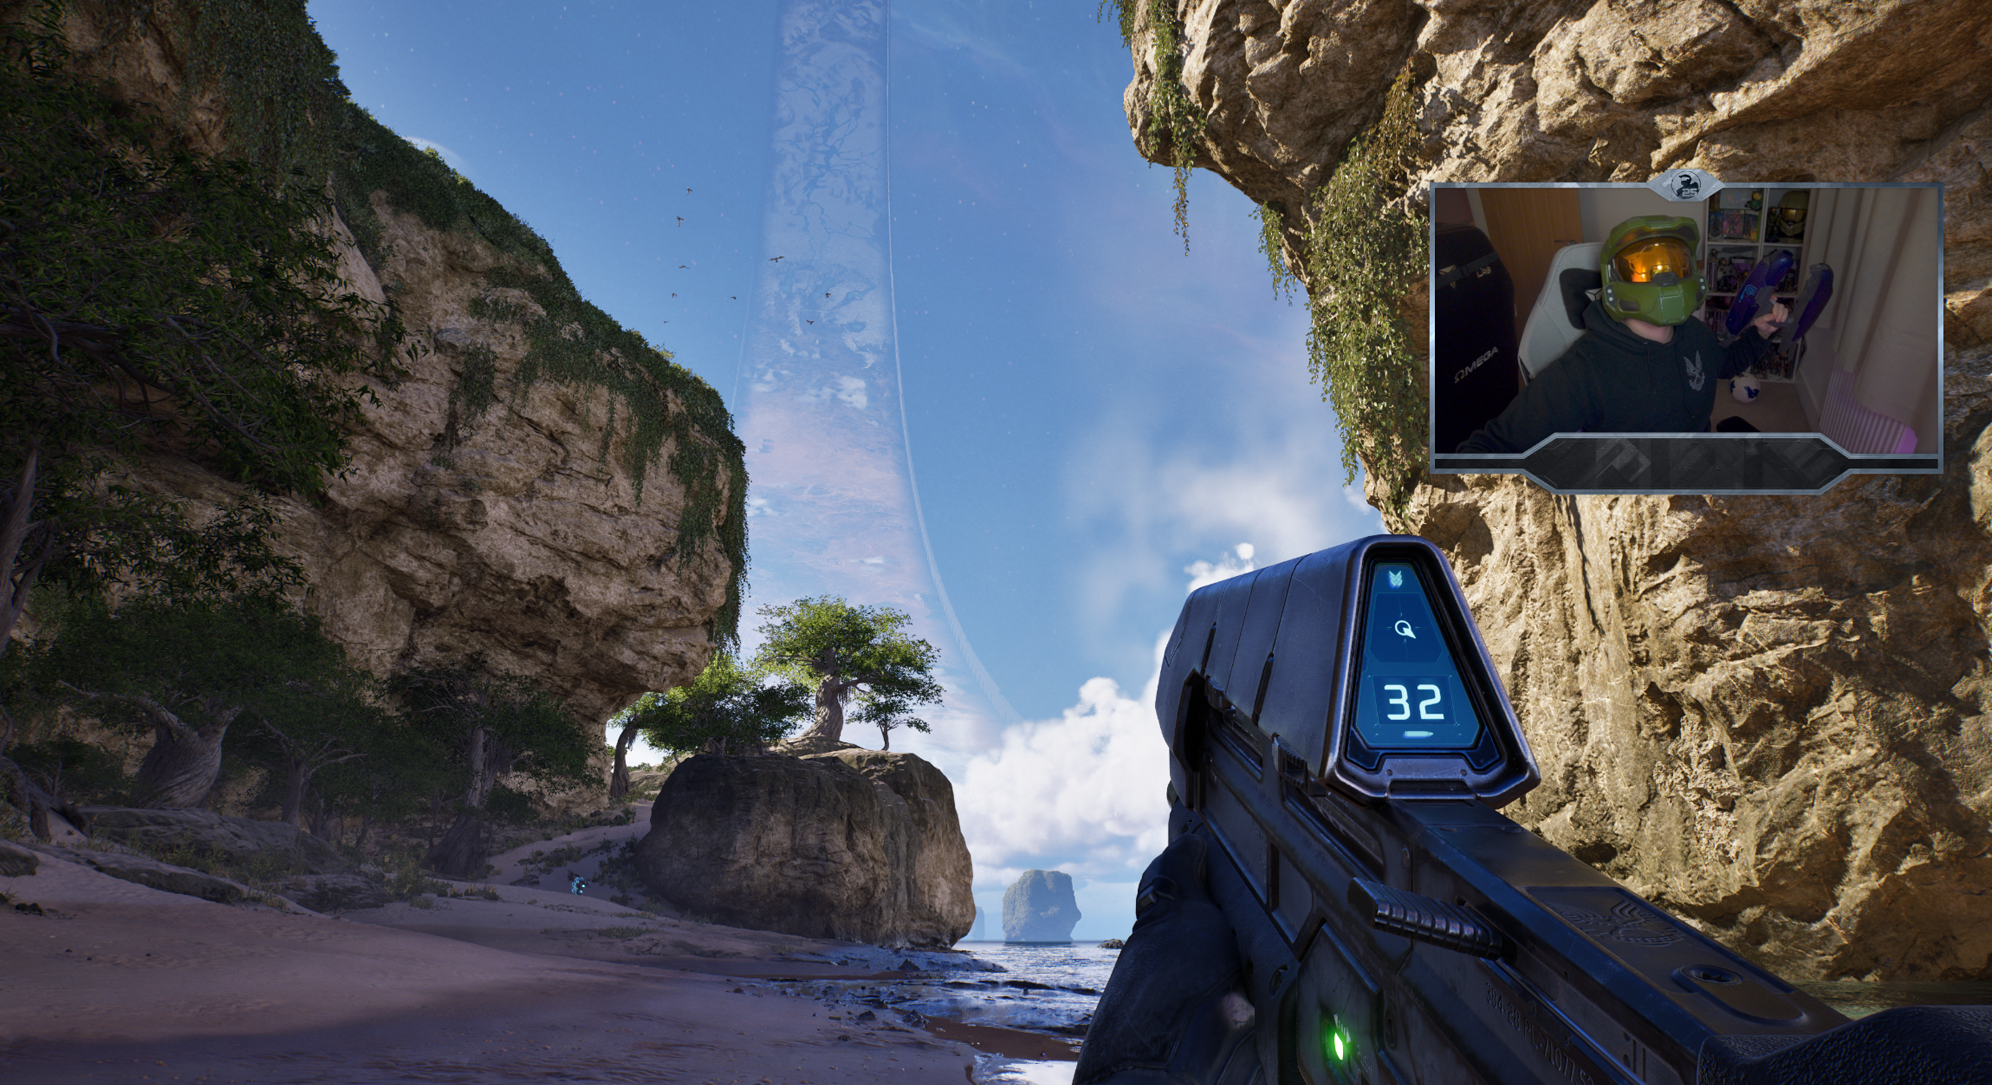
To adjust your camera output exactly how you’d like it, simply click and drag the element to your desired location and scale it using the selectors at the corners. If you’re playing Halo, we recommend placing the webcam output at the upper right of your screen, just above the midline, where it won’t obstruct useful HUD elements.
Now it’s time to add that extra level of polish with a shiny, new webcam overlay.
Go to your “Sources” panel, click the plus icon, and this time select “Image.” Once you’ve given it a name, you’ll be prompted to locate the image in your file browser, and just like magic it will appear in your scene:
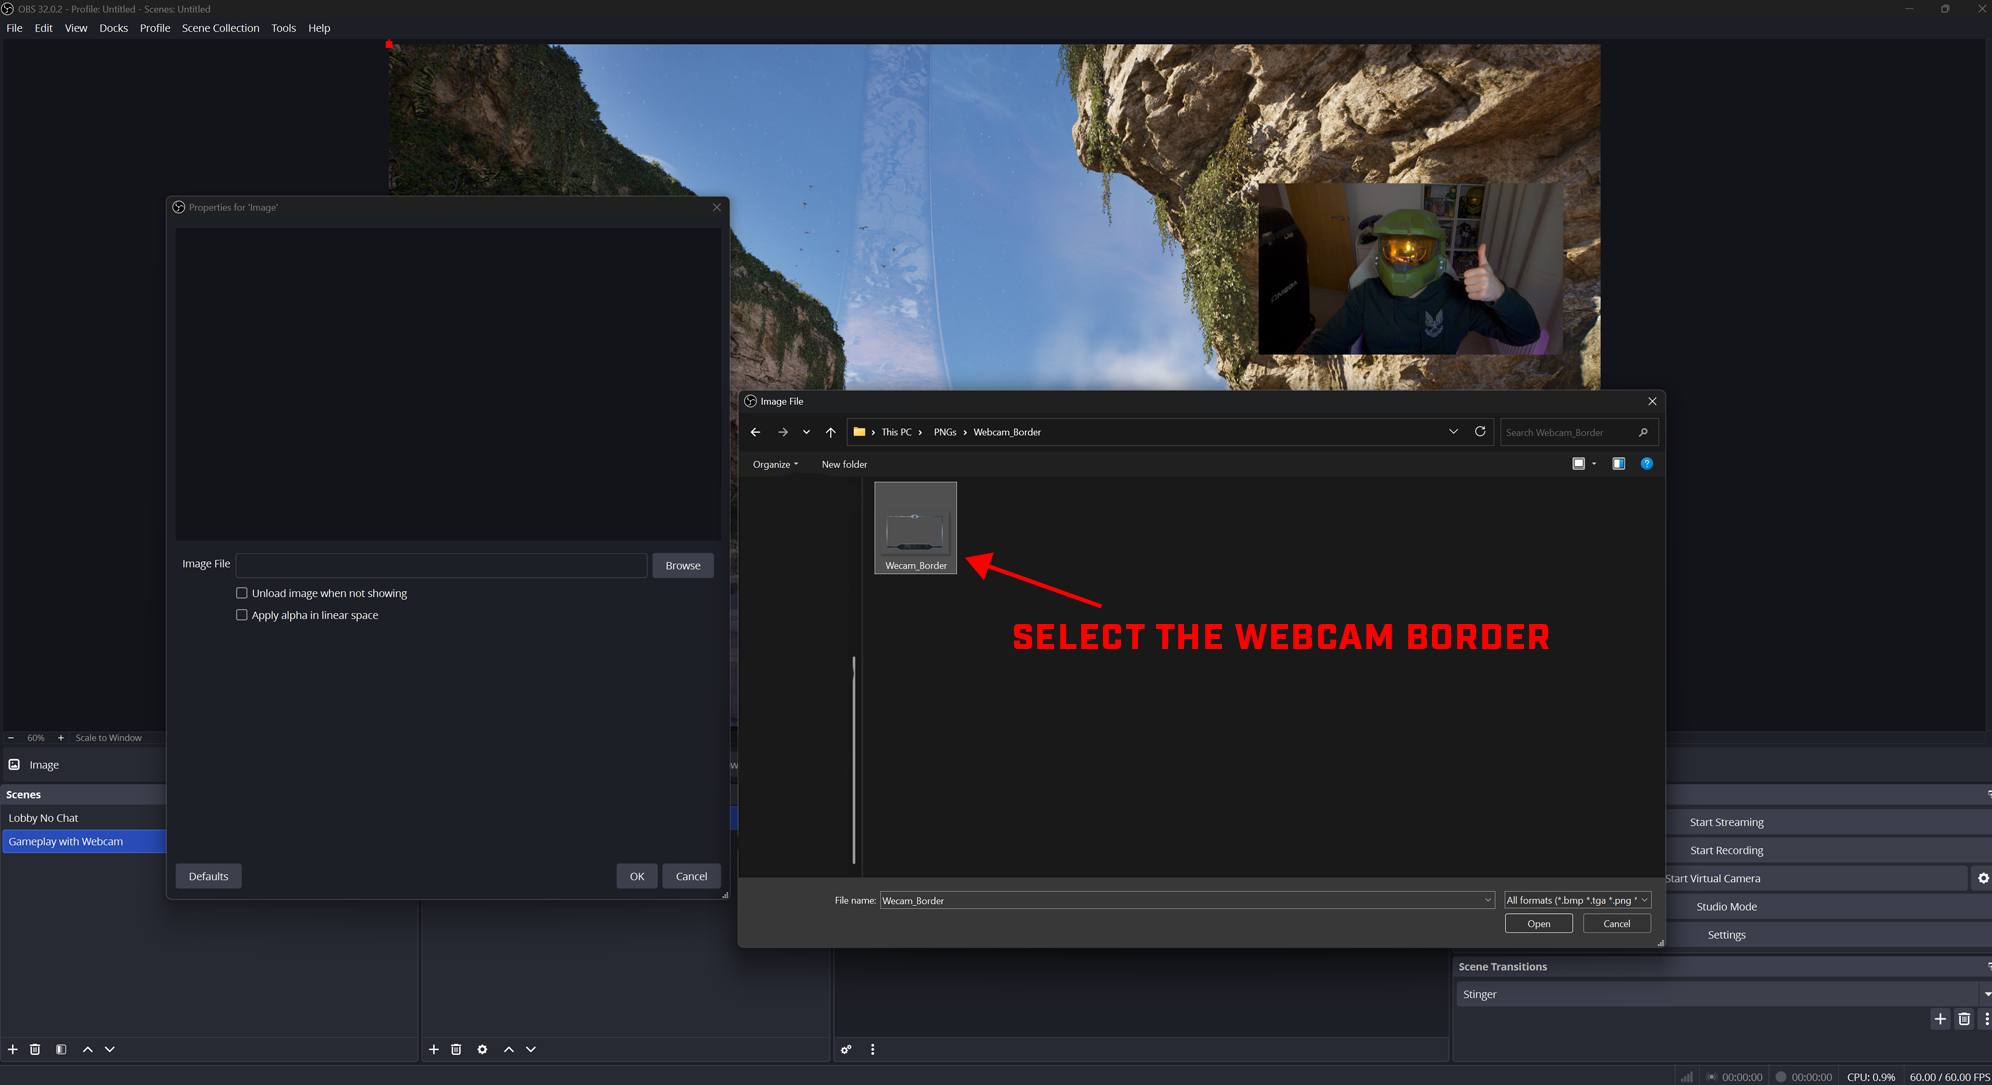
Of course, the webcam overlay won’t automatically be in the correct position, so you’ll need to scale and move it like we did with the webcam, until it perfectly fits your webcam. If your webcam doesn’t quite fit the constraints of the border, you can force the overlay element to crop the webcam output by holding the “Alt” key (on Windows) or “Option” key (on Mac) and adjusting the handles to trim it slightly into shape.
The Content Creator Bundle includes a webcam border without text so you can personalize it with your own username. We’re using the Industry font, which can be purchased online, but any other heavily weighted, sans-serif font will do the trick.
BUILDING CUSTOM ALERTS
Alerts are an optional inclusion that may prove more challenging for new streamers to set up than other scene elements. To help you celebrate Halo’s silver anniversary in style, we’ve tried to explain the process as simply as possible below.
For ease of use, we recommend setting up an account with Streamlabs or StreamElements using your Twitch or Kick login. We’ll be using Streamlabs Desktop to complete the rest of this section’s tutorial.
Once you are logged into Streamlabs, you will see the following dashboard:
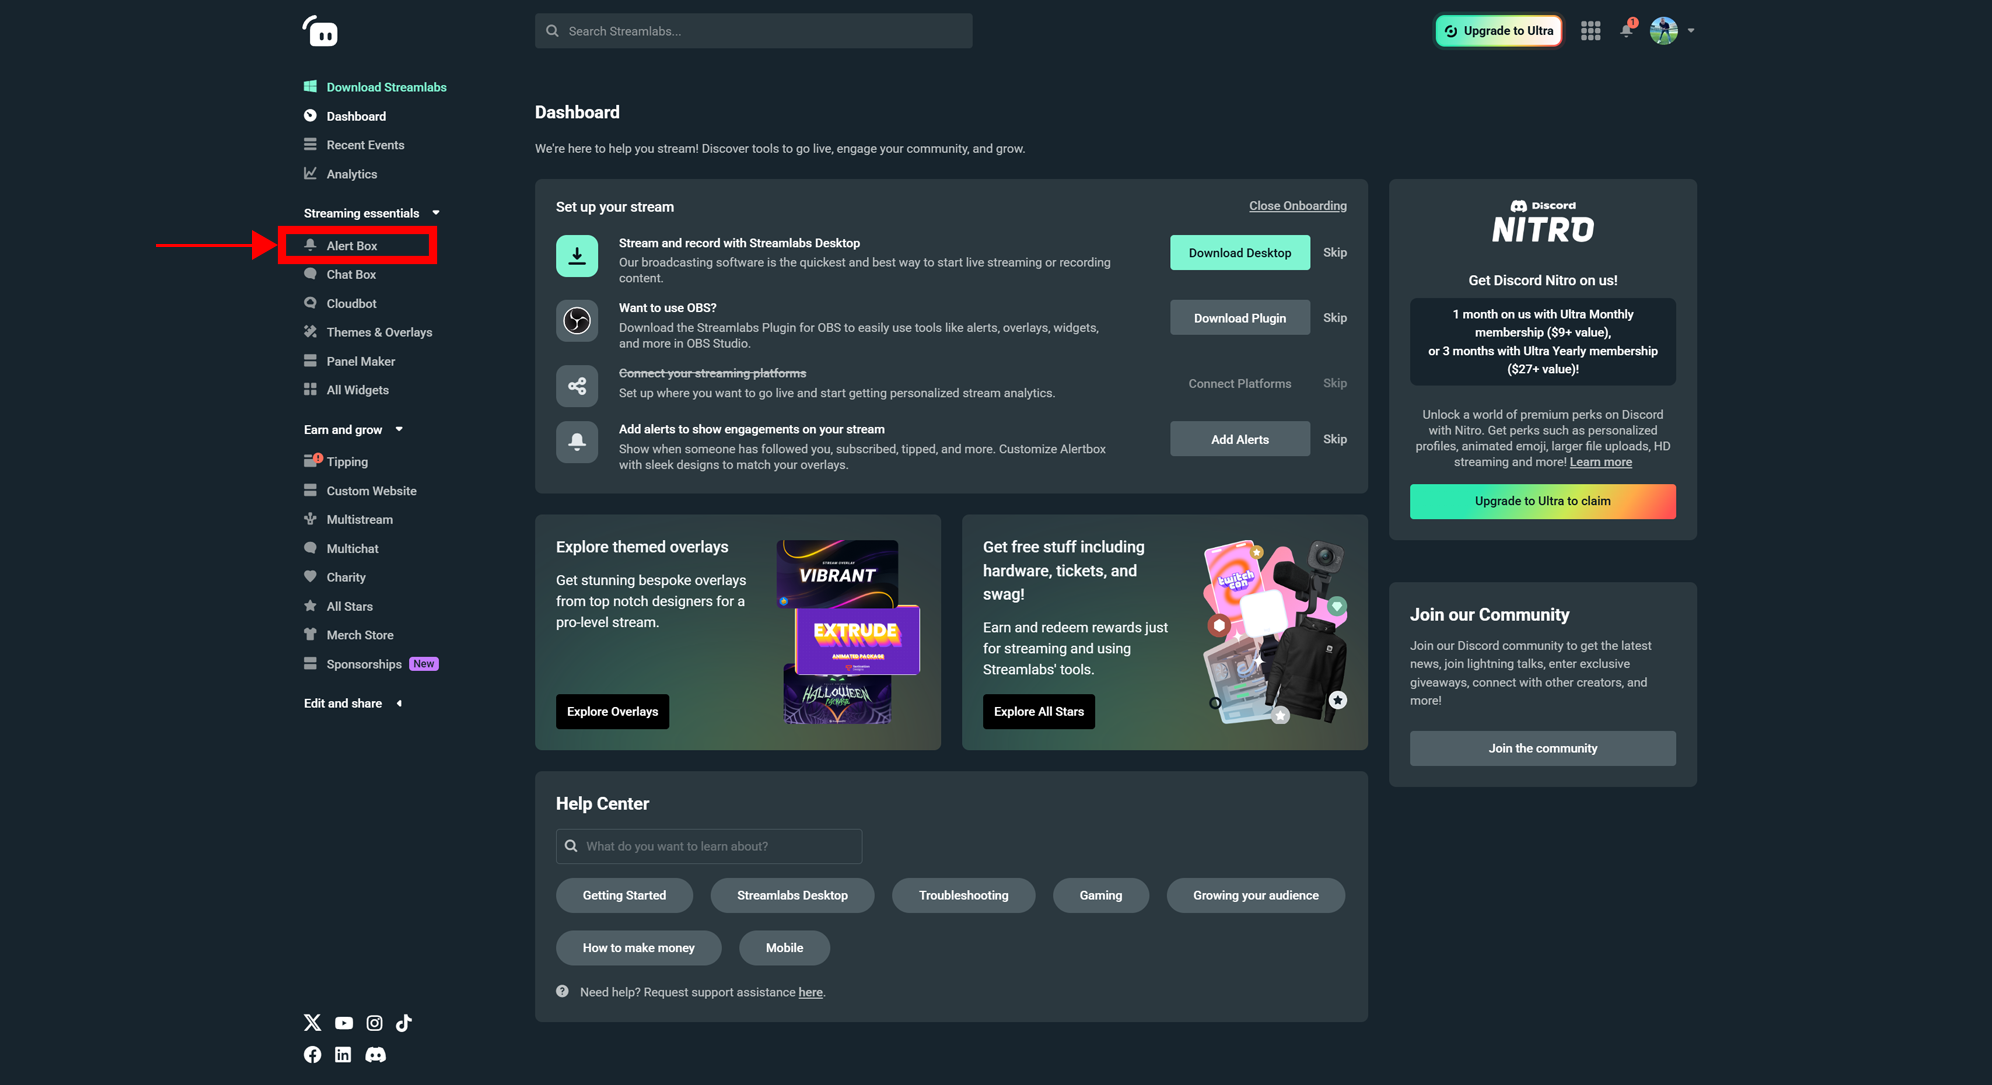
We recommend setting up a “New Follower” alert first. To do this, simply navigate to the left menu and select “Alert Box,” and then select “Add Variation.”
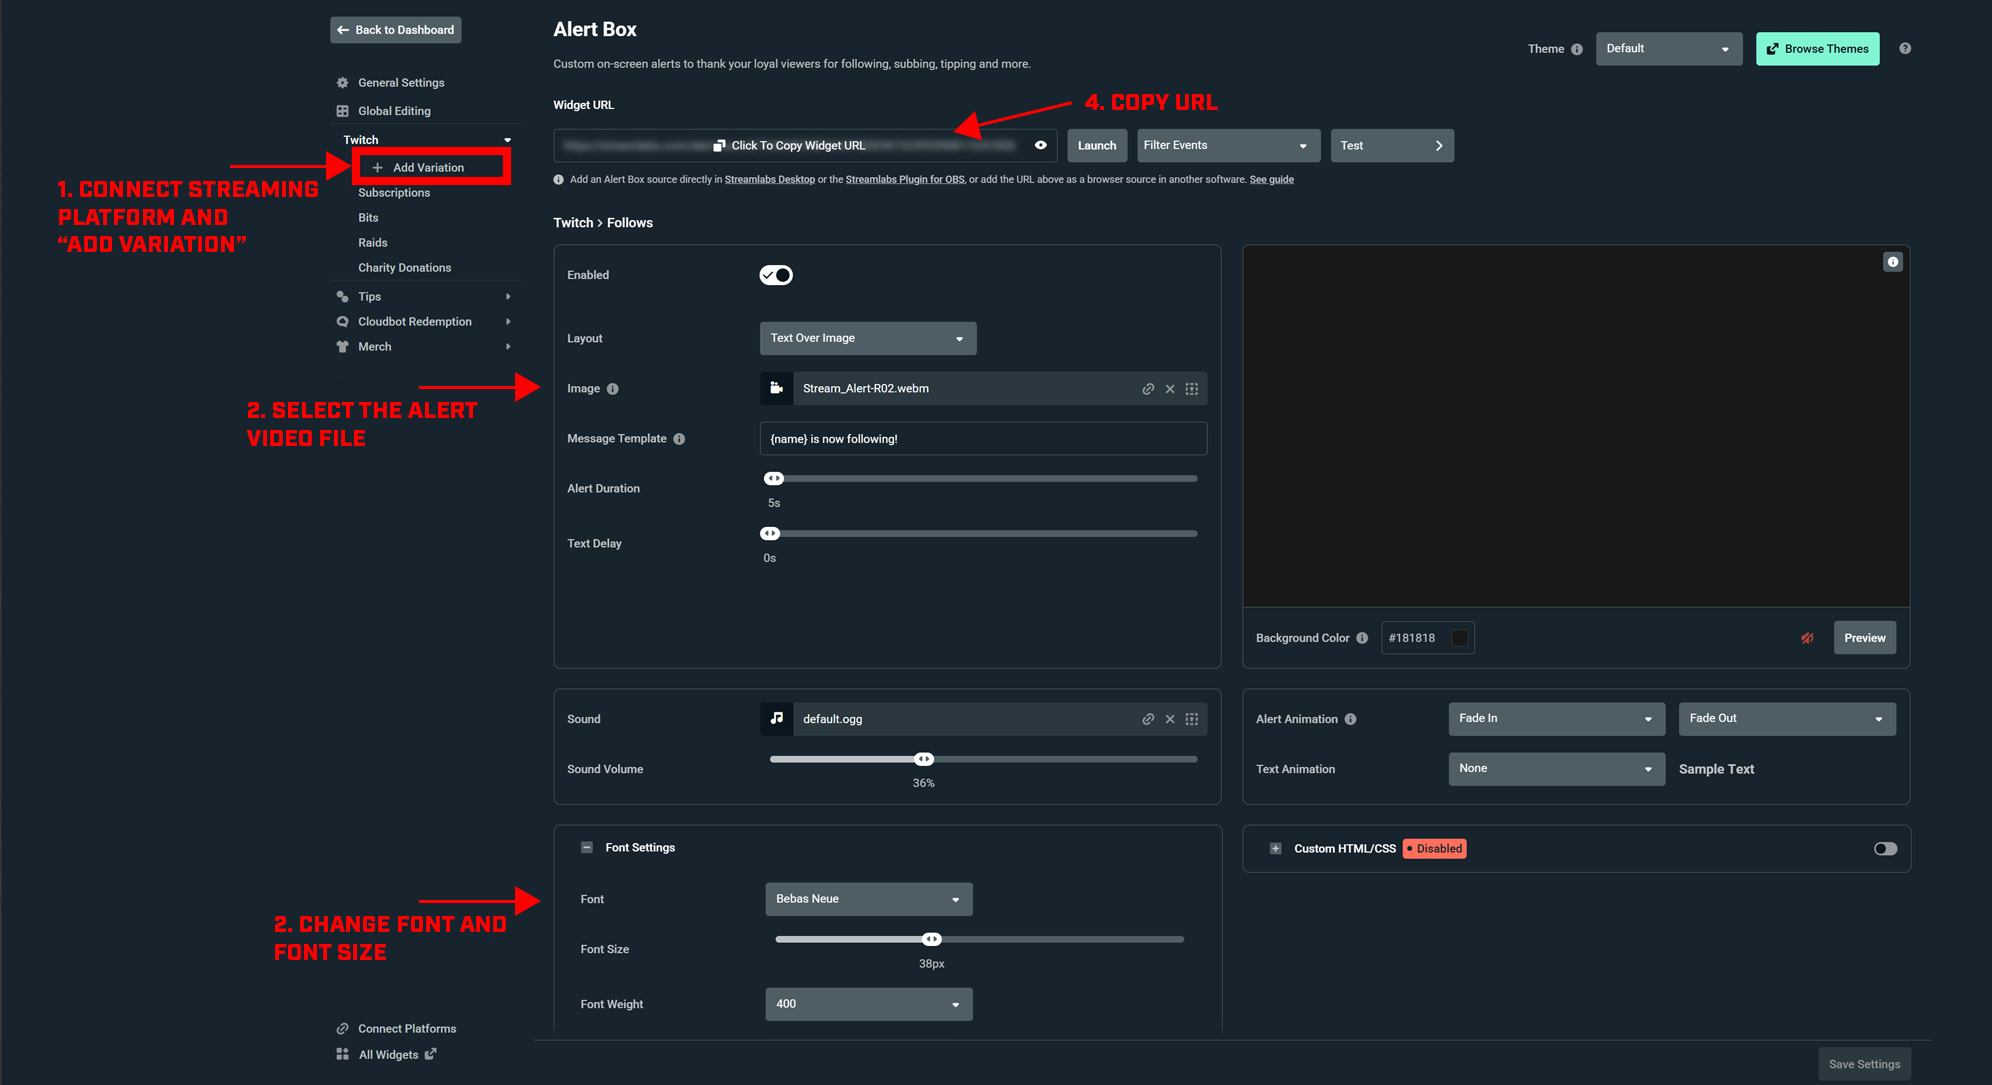
Now it’s time to configure our new alert. From the Alert Box menu, first ensure that your alert is enabled (using the “Enabled” toggle) and that text from your message template will appear over your image by selecting “Text Over Image” from the “Layout” dropdown.
In the next area of the menu, you’ll be prompted to upload files and set up exactly how you want your alert elements to look and sound.
Let’s upload the “Stream-Alert-R02" .webm animation file from the Creator Content Bundle and set its alert duration to five seconds. The “Text Delay” slider will add time between the appearance of the image and the text, if desired.
In the Content Creator Bundle, you’ll also find a collection of Halo sound effects you can upload under the “Sounds” section of the Alert Box menu.
As you proceed to the “Font Settings” section, we suggest using Bebas Neue, size 38px, with a font weight of 400. For the text color, we’ve used #FFFFFF (white), with a highlight color of #7CA1CB (cyan-blue).
You may then choose whichever alert animations you like, but we suggest keeping it simple with “Fade In” and “Fade Out” transitions. Text animation is optional—so strut your stuff!
ADDING ALERTS TO A SCENE
Now that everything has been configured, it’s time to save your settings and copy your new alert widget’s URL, which can be found at the top of the screen.
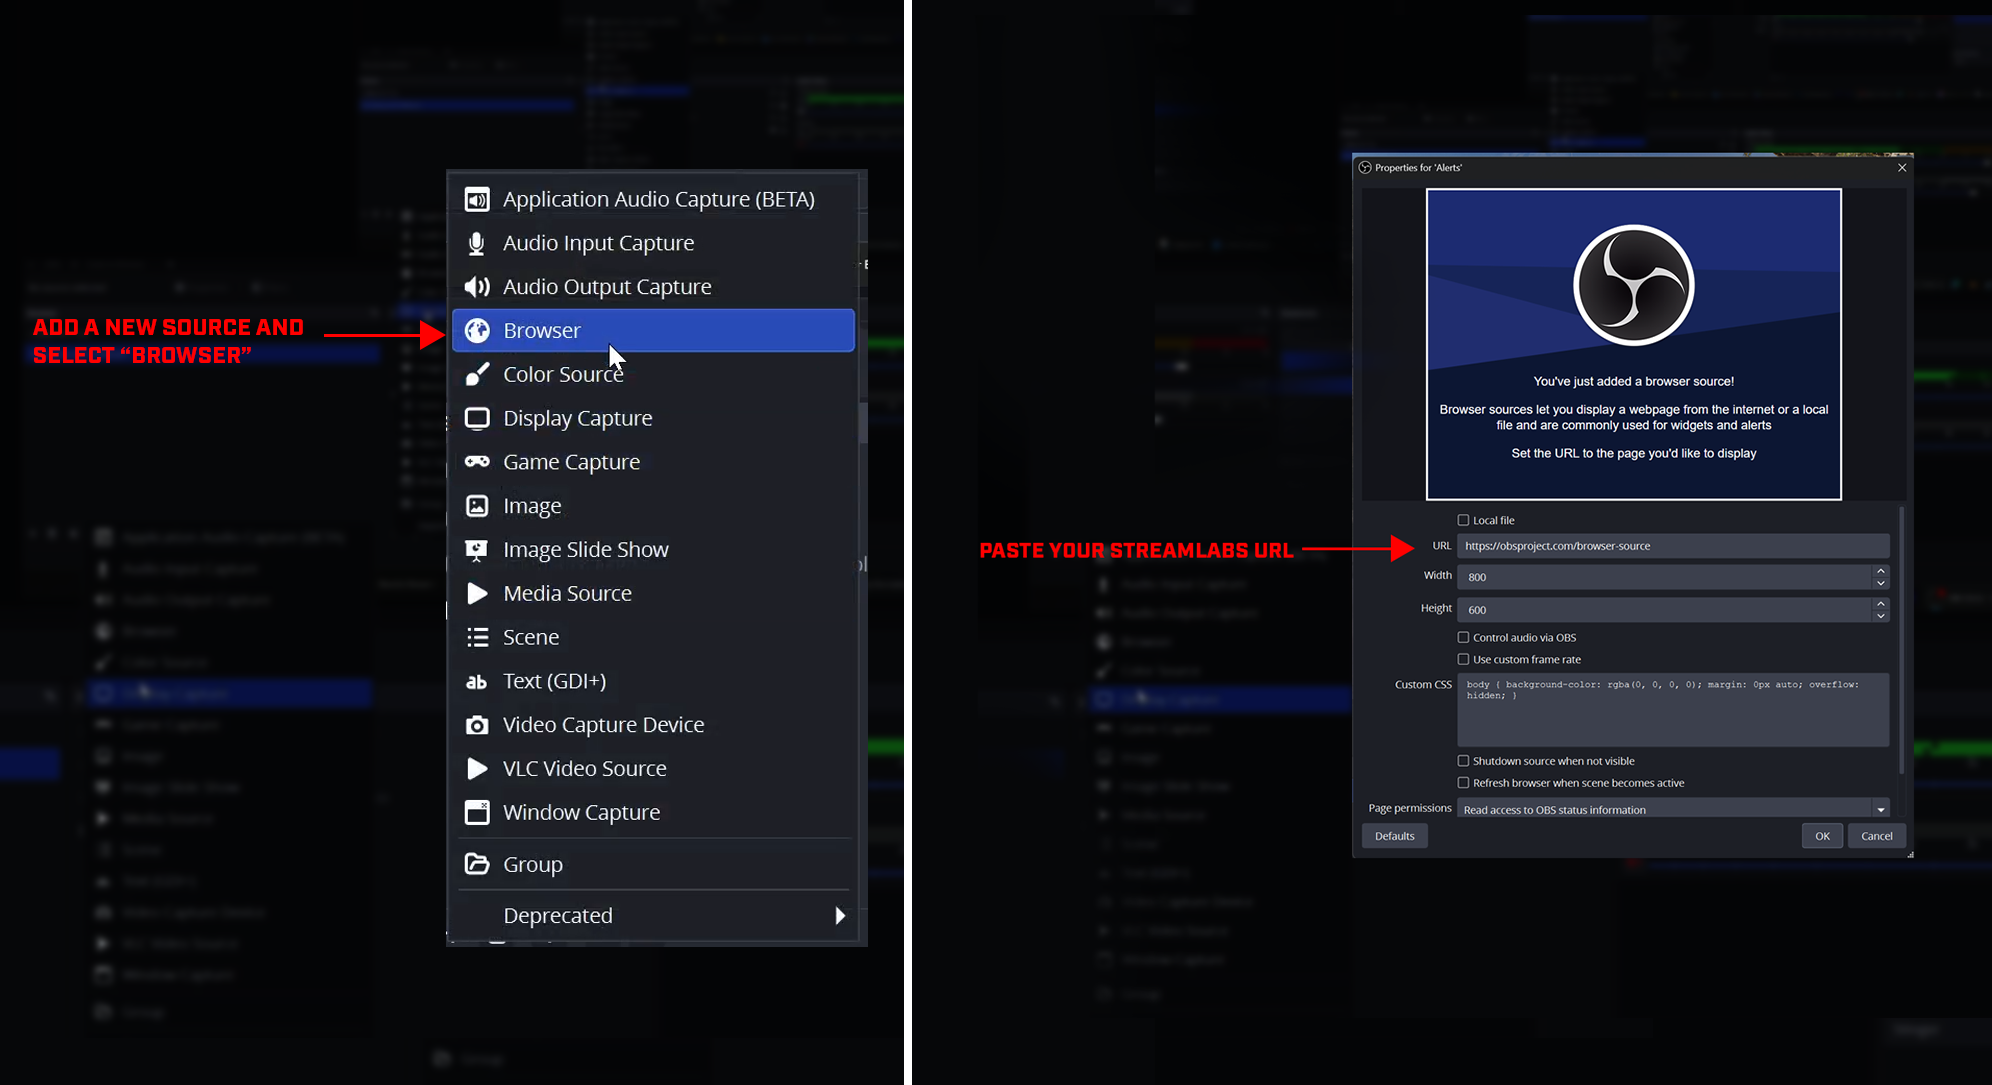
Back in OBS Studio, head to the “Sources” panel, add a “Browser” source, and name it “Alerts.” On the alerts menu that pops up, paste the URL from your Streamlabs widget, make sure the width is set to 800 x 600 pixels, and click “OK.”
Place your alerts wherever you find suitable (we suggest the top-left corner). To make sure everything is hooked up correctly, you may want to head to the Streamlabs site in your browser and click the “Test” button. This test should show the animation working in real time within OBS as it would in a real stream!
It’s worth noting that the text displayed on the Streamlabs website and within the element in your OBS scene may not appear exactly the same in your stream, so have a play with whatever you think looks best!
Once you’re happy with how it looks, you’re ready to repeat this process for other alert messages, such as subscribers, bits, or any other variations you may wish to use.
LOBBY WITH CHAT
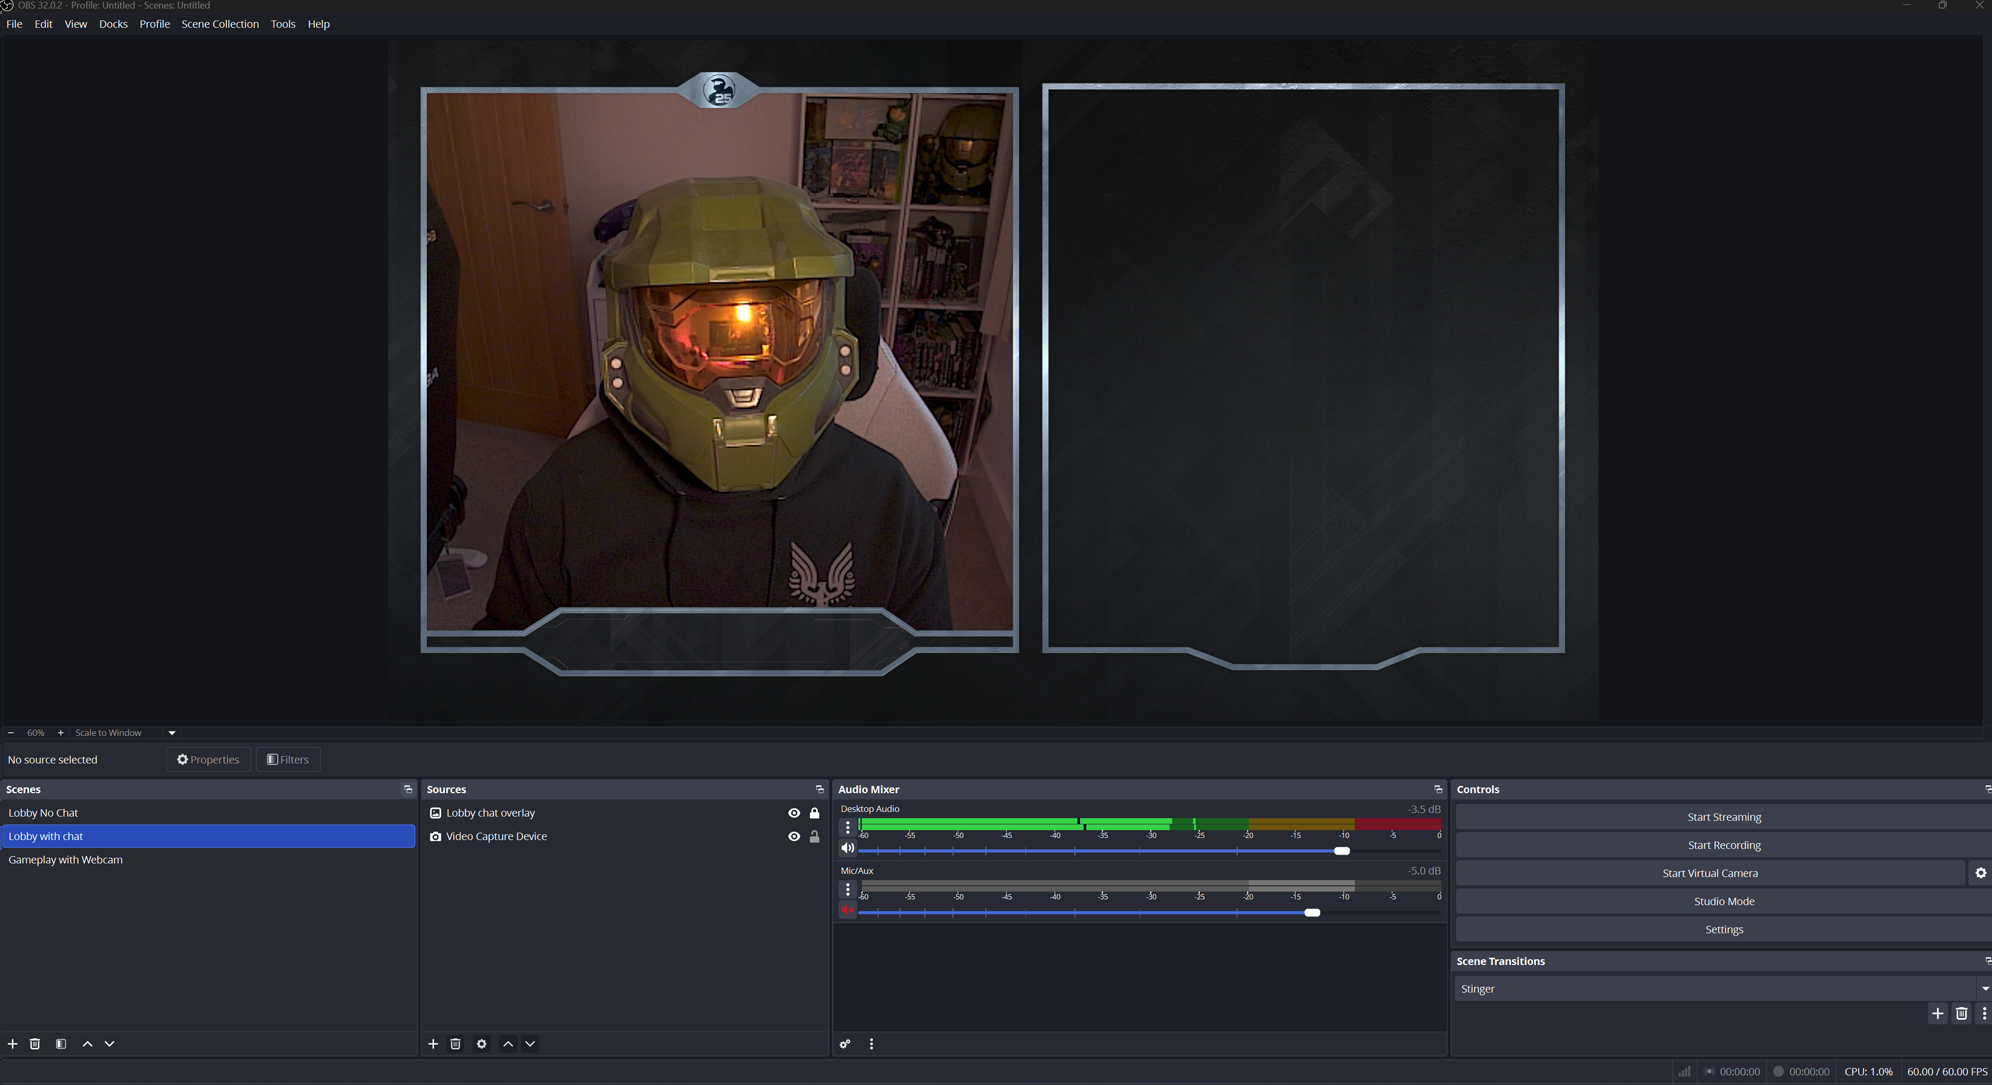
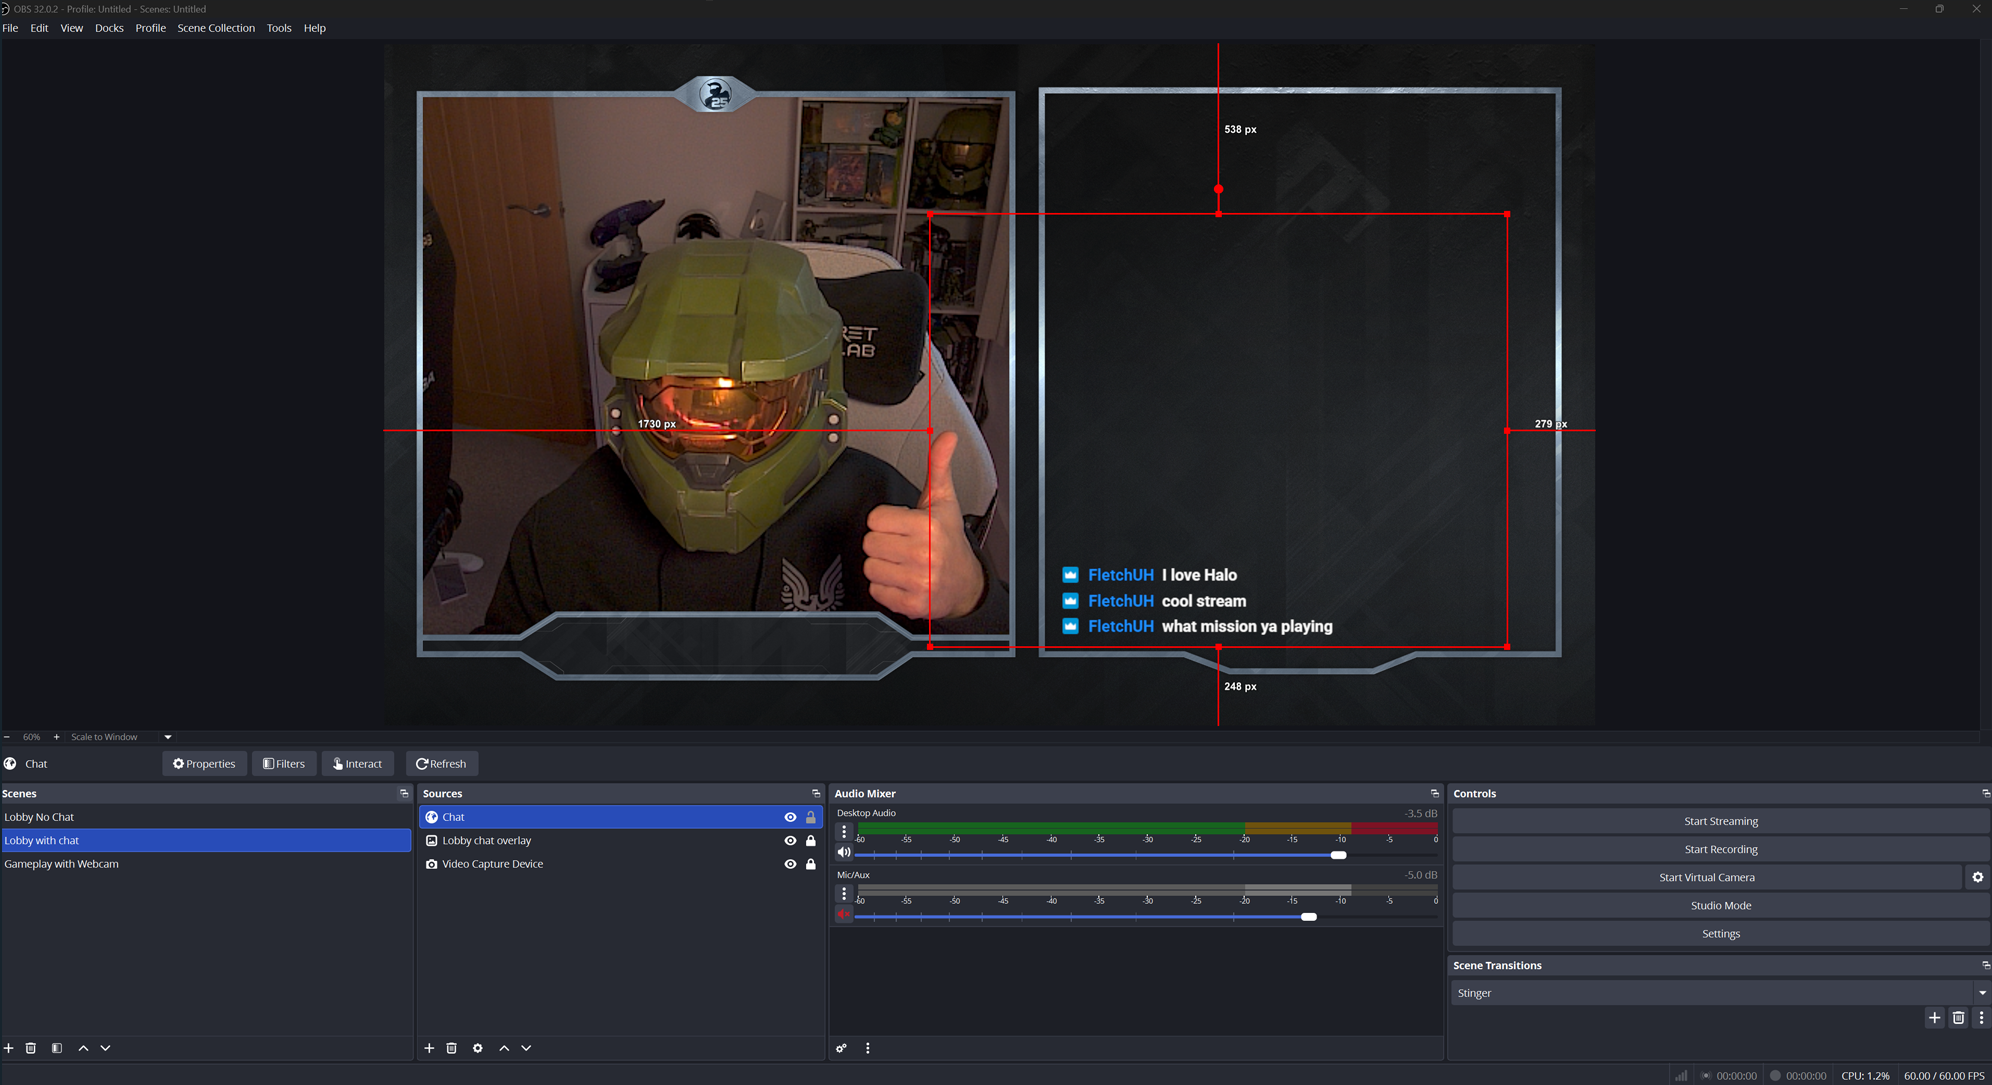
Now that you’re acquainted with the basics of OBS Studio, we’re going to cover how to set up a lobby scene complete with a chat feed. Much like before, you’ll first insert a webcam-output element and then upload an image file containing your lobby and chat overlay.
Once everything has been scaled and aligned, your scene should look something like this:
To configure your chat feed to appear in your new scene, return to the Streamlabs dashboard and select the “Chat Box” option.
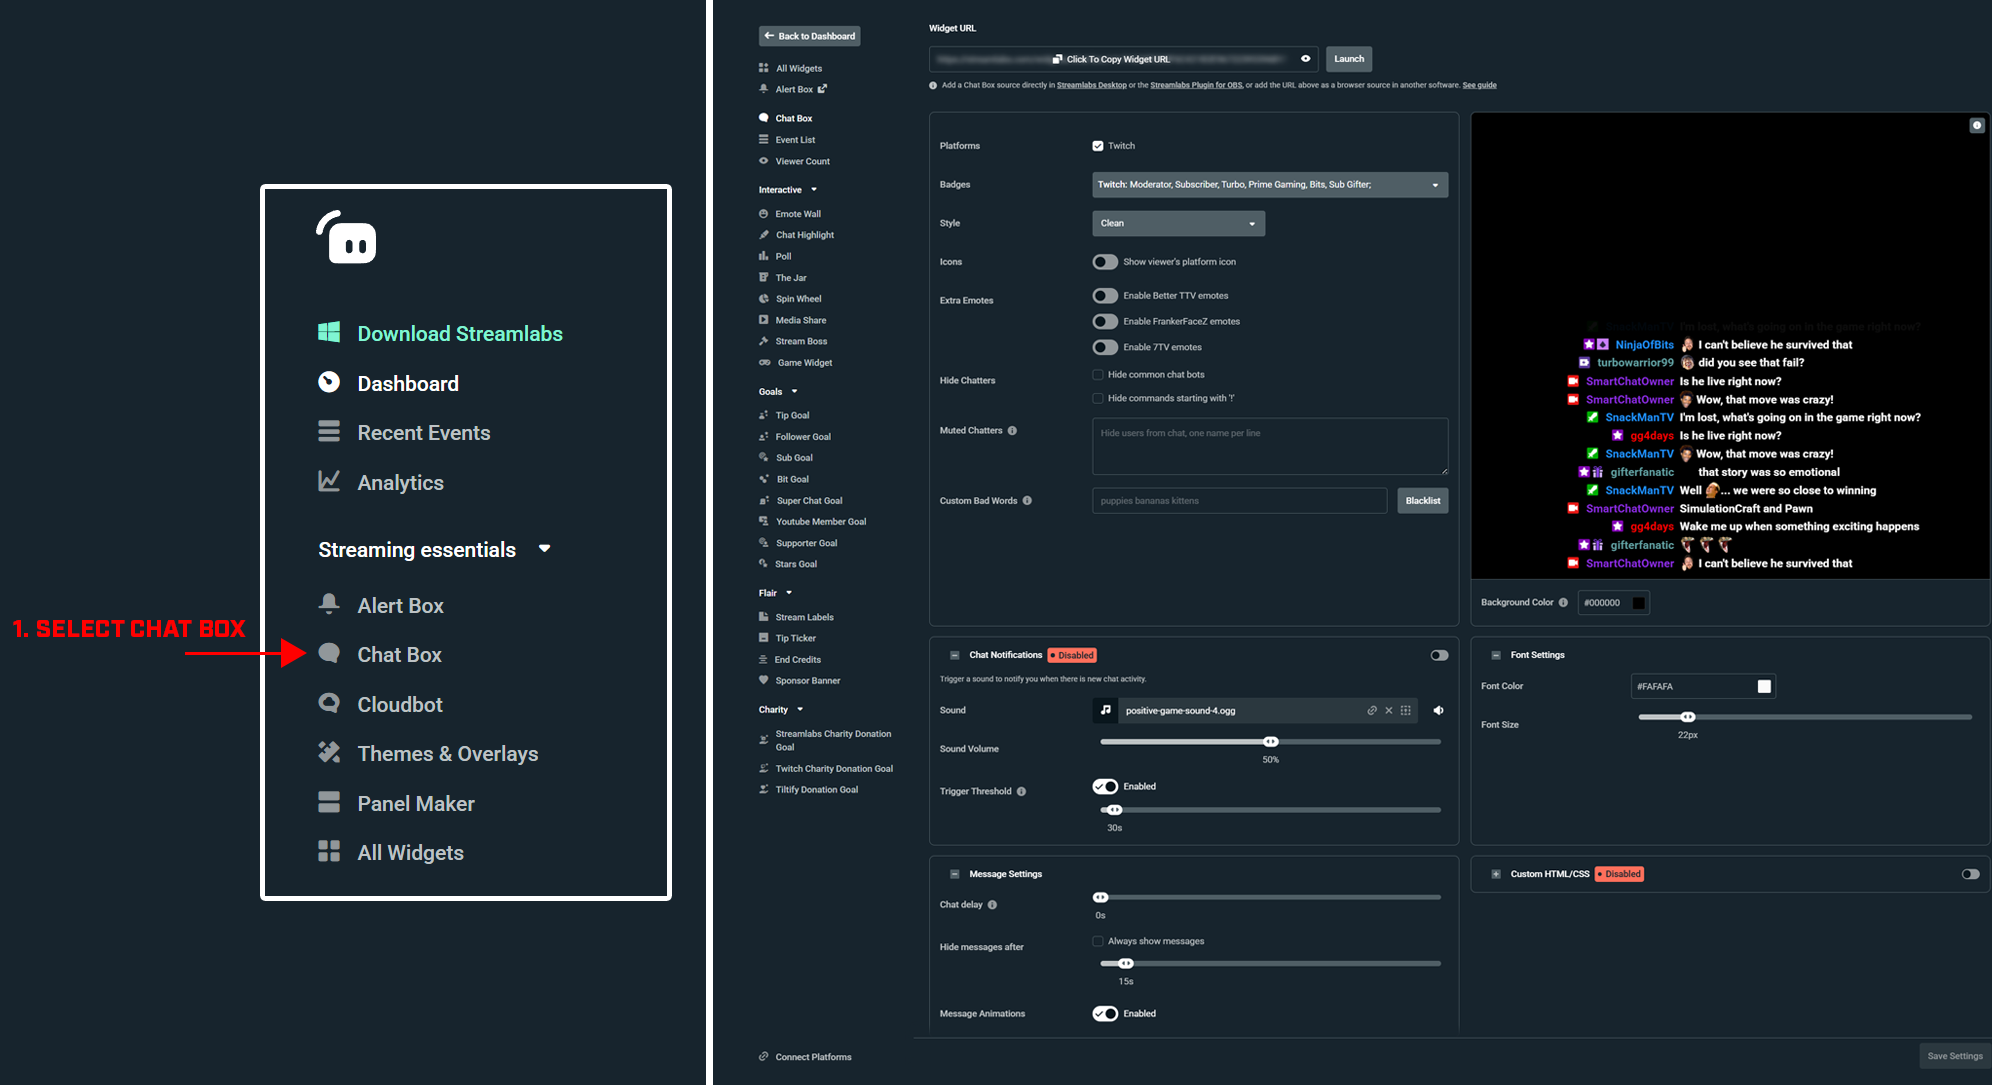
In the Chat Box menu you’ll find all the settings you need to make your chat both a fun and welcoming place, as well as customize it to your own liking:
We strongly recommend blacklisting any unpleasant words in your chat and disabling chat notifications in case your chat starts to really pop off! Otherwise, all other base settings are great. The next step is to click “Save Settings” and copy the widget URL like you did for your subscriber alert.
Head back to OBS Studio, add a new “Browser” source, and insert the chat widget URL. First-timers can keep all the base settings unmodified, unless you’d like to explore.
Don’t worry if your chat’s text isn’t perfectly centered to the frame on your image overlay. You can align the chat however you like by dragging and resizing the element as before.
To see if it’s all working, it’s a good idea to head to your stream type some test messages into your chat!
ADDITIONAL SCENES
Congratulations on setting up your lobby and gameplay scenes! We’ve taught you the basics, and the same principles should help you set up other scenes (e.g., “Starting Soon”) with ease on your own.
The last course of action is to make your stream look cool when transitioning between your shiny new scenes…
CONFIGURING TRANSITIONS
To give your stream that extra bit of polish, you may want to consider a transition that seamlessly gets you from one scene to another—like the one we’ve included in the Silver Anniversary Creator Content Bundle!
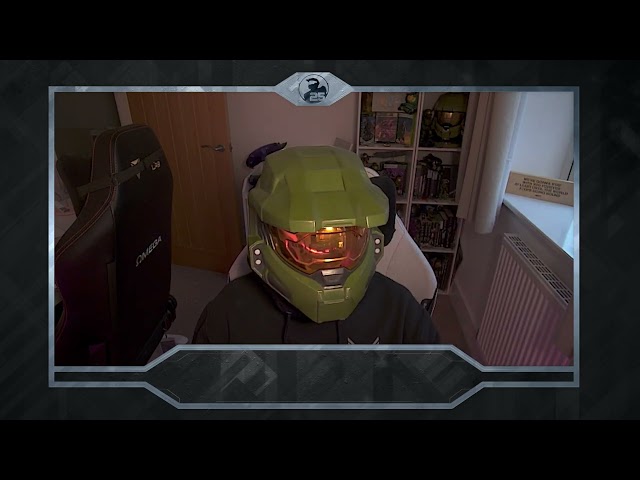
Check out the video below for a preview of that transition:
To add this scene transition to your streaming setup, simply go to the “Scene Transitions” panel at the bottom-right of OBS Studio and select the “Stinger” option.
Once selected, click the plus icon to the right to bring up the “Stinger Properties” window.
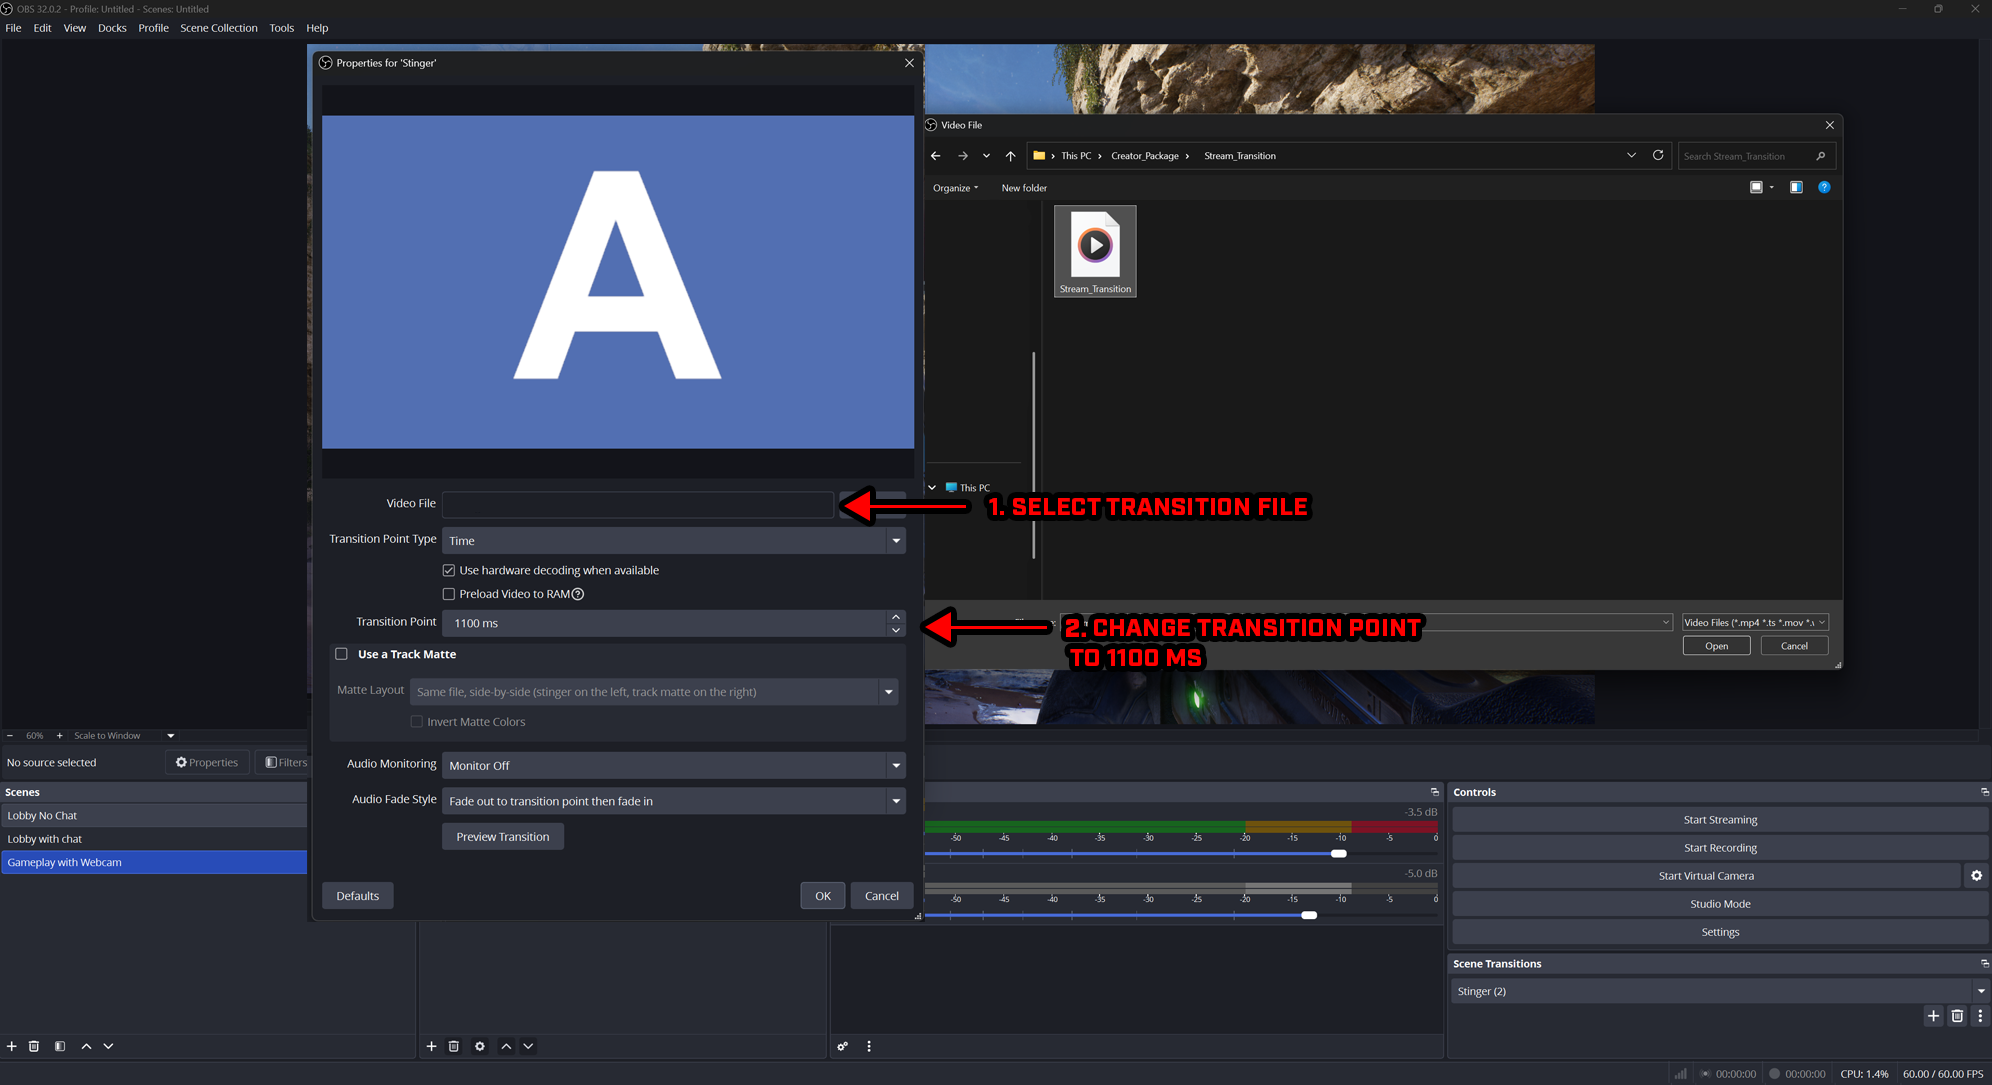
On this screen you’ll need to upload the appropriate video file, select “Time” from the “Transition Type Point” dropdown, and set the “Transition Point” to 1,100 milliseconds. These settings will instruct OBS to add a brief visual delay between transitions while the software changes to a new scene in the background.
We also recommend using hardware decoding and, if your PC has sufficient RAM available while also running your game, enabling the “Preload to RAM” option to help performance.
CONGRATULATIONS!
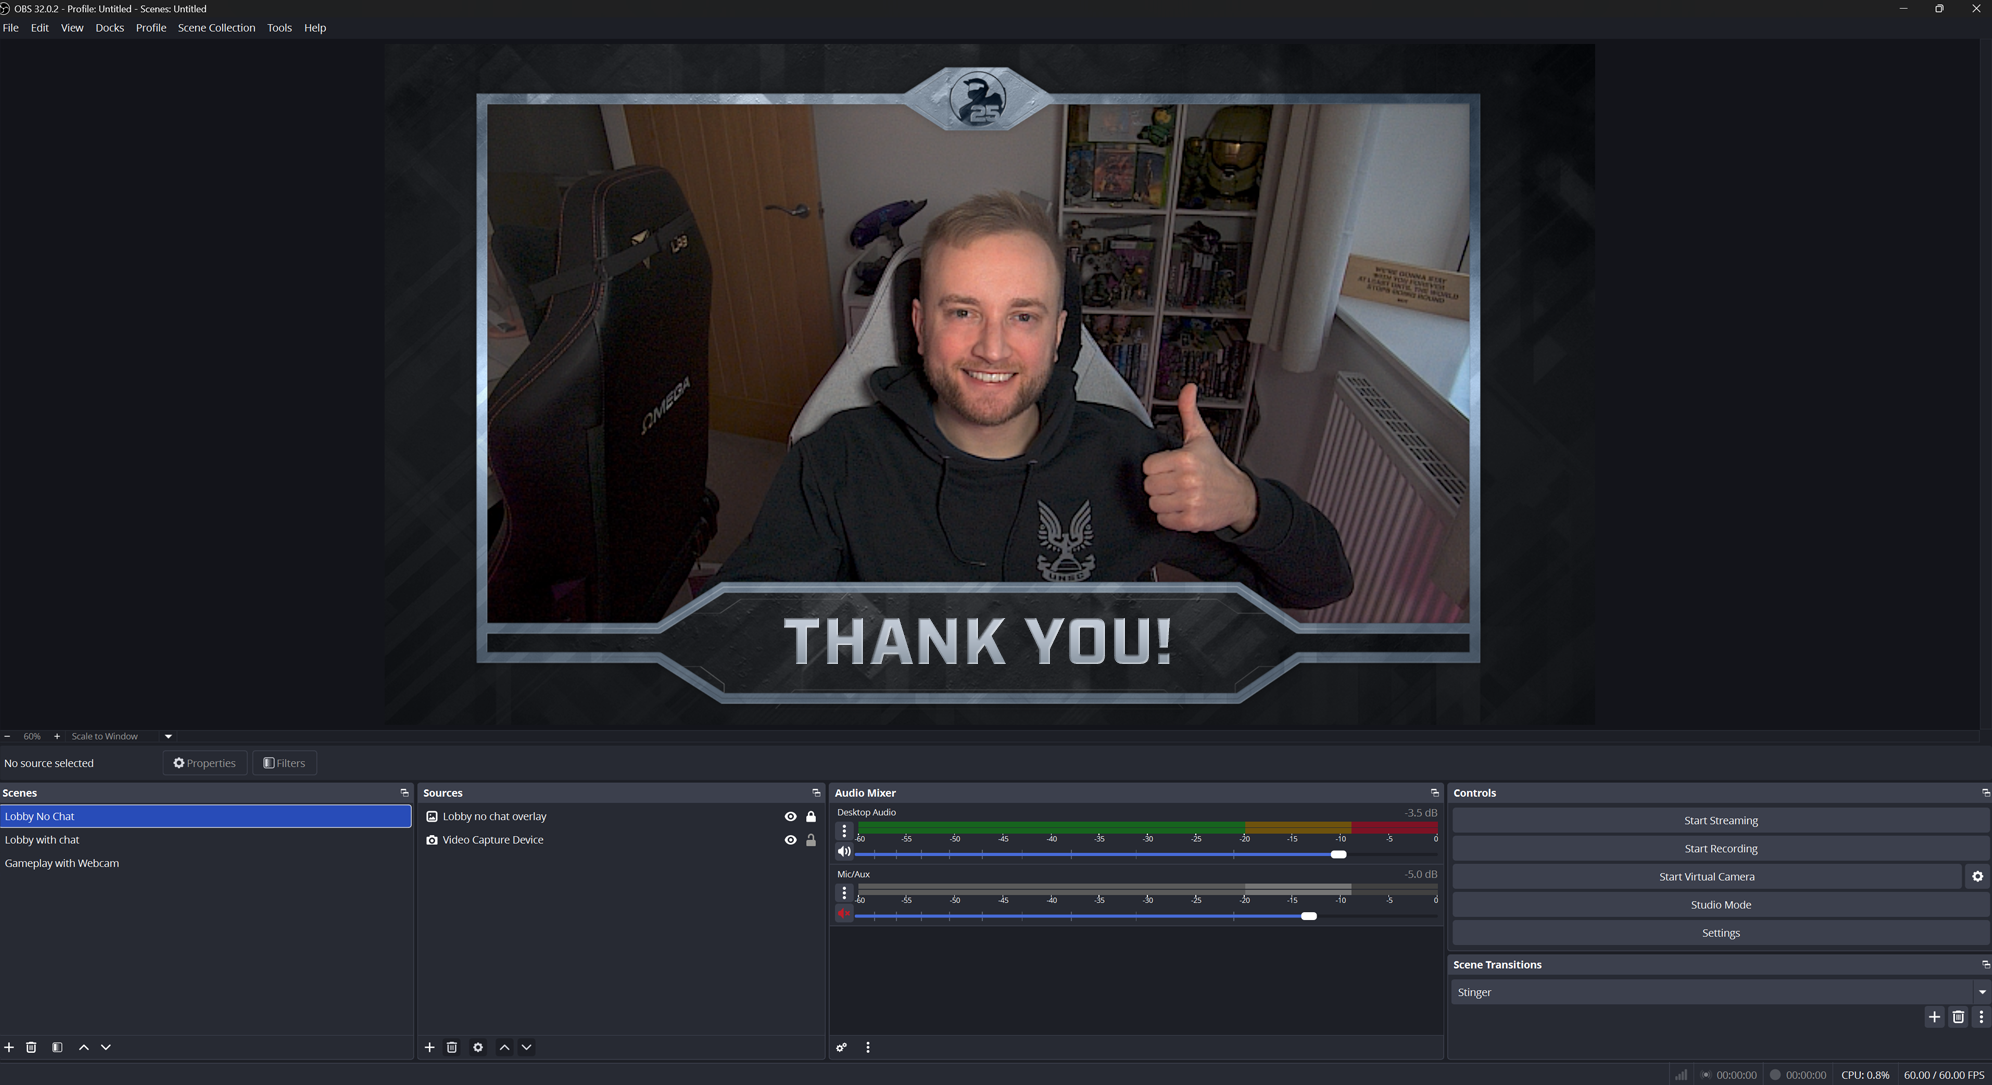
You’re now set up to stream in style! We’ll be keeping an eye out for community feedback on the content creator bundle all year long. Don’t forget to check back on the Silver Anniversary Community Hub for more creator content later this year.
Have an idea for even more content goodness? Want a specific emoji added to the bundle? Let us know @Halo on social media or in our official Halo Discord server!
And don’t forget to share your favorite Halo memories, celebrate Halo's iconic legacy, and vote on community polls in our official Discord server all year long to help us tell the whole Halo story. Whether you’re a battle-hardened Spartan or a Halo rookie, we hope you’ll join the fun. #Halo25Together